

Step-by-step air conditioning service guide for UK homes
TL;DR:
- Regular DIY filter checks and twice-yearly professional servicing are essential for maintaining an efficient and long-lasting air conditioning system. Proper preparation, including safety precautions and outdoor unit clearance, helps prevent costly breakdowns and performance issues. Scheduling professional inspections before summer and after heavy use ensures optimal system performance and early detection of potential faults.
A well-serviced air conditioning system runs more efficiently, lasts longer, and costs less to operate. This step-by-step air conditioning service guide covers every stage of routine HVAC maintenance, from the tools you need before you start to the professional tasks that require a certified engineer. Whether you manage a single property in Suffolk or several homes across Norfolk and Essex, following a structured service routine is the single most effective way to protect your investment and avoid expensive breakdowns during peak summer heat.
What tools and preparations do you need before servicing your air conditioner?
Preparation determines whether a service job goes smoothly or creates new problems. Before touching any part of your system, gather the right tools and take safety seriously.
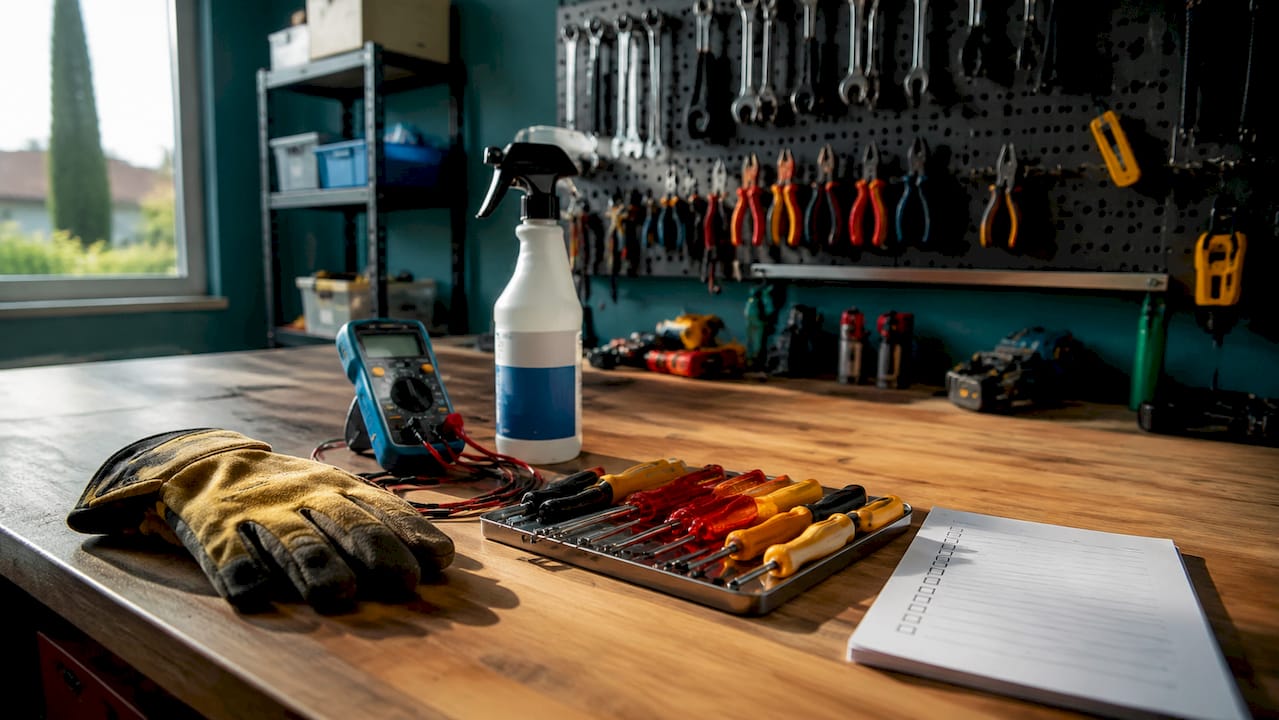
Essential tools for DIY air conditioning maintenance:
- Soft-bristle brush and fin comb for cleaning condenser fins
- Screwdrivers (flathead and Phillips) for accessing panels
- Vacuum cleaner with a brush attachment for removing debris
- Replacement air filters matched to your unit’s specification
- Coil cleaner spray (non-rinse formula for indoor coils)
- Bucket and flexible brush for flushing condensate drain lines
- Multimeter for basic electrical checks (advanced users only)
- Gloves and safety glasses
Pro Tip: Switch off the power at the circuit breaker before opening any panel. Do not rely on the unit’s remote or wall switch alone. Confirm the power is off by attempting to start the unit before you begin.
The preparation checklist below covers the key steps before you start any maintenance task.
| Preparation step | Why it matters |
|---|---|
| Isolate power at the breaker | Prevents electric shock during cleaning or panel access |
| Clear 2 to 3 feet around the outdoor unit | Outdoor unit clearance maintains airflow and prevents overheating |
| Check manufacturer’s manual | Confirms correct filter type, coil cleaner compatibility, and service intervals |
| Photograph wiring before disconnecting | Avoids reassembly errors, especially on older units |
| Have replacement filters ready | Saves a second trip if the existing filter is beyond cleaning |
Clearing the area around your outdoor condenser unit is not optional. Overgrown shrubs, stored garden equipment, or accumulated leaf debris all restrict airflow and force the compressor to work harder. This directly raises your energy bills and shortens the unit’s lifespan.
Step-by-step DIY tasks for routine air conditioning maintenance
DIY routine maintenance takes roughly 15 minutes and makes a measurable difference to system performance between professional visits. Follow this sequence every time.
-
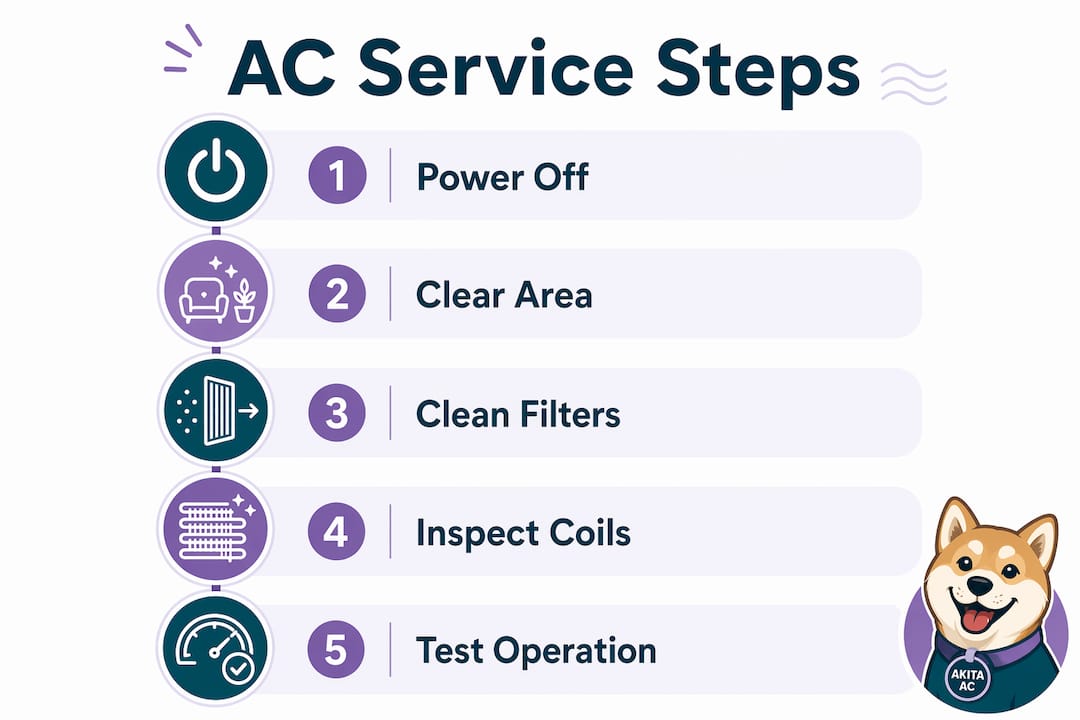
Turn off the power. Isolate the unit at the circuit breaker. Confirm it is off before proceeding.
-
Remove and inspect the air filter. Slide out the filter and hold it up to the light. A grey, clogged filter restricts airflow and forces the system to work harder. The Department of Energy recommends checking filters every 30 days and replacing them every 60 to 90 days. In homes with pets or high dust levels, replace more frequently. This single task has the greatest impact on efficiency of anything a homeowner can do themselves.
-
Clean or replace the filter. Washable filters can be rinsed with cold water and left to dry completely before reinsertion. Disposable filters should be replaced with the correct size and MERV rating for your unit.
-
Clean the evaporator coils. Located inside the indoor unit, evaporator coils collect dust and reduce heat exchange efficiency over time. Apply a no-rinse coil cleaner spray, allow it to foam and drip into the drain pan, then leave it to work. Do not scrub the fins as they bend easily.
-
Clean the condenser coils and fins outdoors. Use a soft brush to remove surface debris from the condenser fins. For heavier build-up, a garden hose on a gentle setting can be used to rinse from the inside out. A fin comb straightens any bent fins, which improves airflow immediately.
-
Flush the condensate drain line. Pour a cup of diluted white vinegar or a specialist condensate cleaner into the drain pan access point. This prevents algae and mould build-up that causes blockages, water leaks, and unpleasant odours inside the home.
-
Check the outdoor unit clearance. Remove any leaves, grass clippings, or debris from around the unit. Maintain at least 2 feet of clear space on all sides.
-
Test the thermostat. Restore power and set the thermostat to cooling mode, dropping the target temperature below the current room temperature. Confirm the unit starts within a few seconds and that cool air flows from the vents within a minute or two.
-
Check airflow from all vents. Walk through the property and confirm that every supply vent is open and unobstructed. Closed or blocked vents create pressure imbalances that reduce efficiency and can damage the system over time.
Pro Tip: Never attempt to handle refrigerant yourself. Refrigerant handling in the UK requires F-Gas certification. Attempting it without certification is illegal and dangerous.
Safety boundary: DIY maintenance covers filters, coils (surface cleaning only), drain lines, and airflow checks. The sealed refrigerant circuit, electrical connections, and compressor are strictly for certified engineers.
When and why should you schedule professional air conditioning servicing?
Professional servicing covers tasks that go beyond what any homeowner should attempt. A certified engineer checks refrigerant levels, tests electrical connections, measures airflow precisely, and calibrates the thermostat to manufacturer specifications. Full professional servicing includes deep coil cleaning with specialist equipment, compressor assessment, and a full system performance report.
Tasks that require a professional engineer:
- Refrigerant leak detection and recharging (F-Gas certified only)
- Electrical connection testing and tightening
- Compressor health assessment
- Deep evaporator and condenser coil cleaning
- Thermostat calibration against a reference instrument
- Condensate pump testing and replacement if needed
- Full system efficiency report
Two professional visits per year represent the standard recommendation for most residential systems. The first visit in early spring prepares the system for summer cooling demand. A second visit in autumn checks for wear after heavy summer use and prepares the system for any winter heating function if your unit is a heat pump.
“Booking your spring service early is not just about convenience. Engineers are significantly less busy in February and March than in June, which means faster appointments, more thorough attention, and lower call-out costs in many cases.”
Early spring scheduling also gives you time to order parts if anything needs replacing before the hot weather arrives. A failed component discovered in April is a manageable inconvenience. The same failure discovered during a July heatwave means days without cooling and emergency call-out rates.
When choosing a professional, look for F-Gas certification, clear fixed-price servicing, and a written report after each visit. Ask specifically whether the service includes refrigerant checks, coil cleaning, and electrical testing. A service that only covers filter replacement is not a full professional service.
How can you troubleshoot common air conditioning problems before calling a professional?
Approximately 90% of service calls relate to issues a homeowner can identify and often resolve in under ten minutes. Work through this checklist before booking an engineer.
Basic troubleshooting checks:
- Thermostat settings: Confirm the unit is set to cooling mode and the target temperature is below the current room temperature. Check that the thermostat has working batteries if it is wireless.
- Circuit breaker: Check the consumer unit for a tripped breaker. Reset it once. If it trips again immediately, stop and call an engineer. A repeatedly tripping breaker indicates an electrical fault.
- Air filter: A blocked filter is the most common cause of poor cooling and frozen coils. Remove and inspect it before assuming a mechanical fault.
- Outdoor unit: Check that the outdoor condenser fan is spinning when the system is running. A fan that is not moving points to a failed run capacitor, which is the most common part failure in outdoor units and requires professional replacement.
- Frozen coils: If you see ice on the indoor unit, turn the system off and switch the fan to run-only mode. Allow the coils to defrost for two hours, then check and replace the filter before restarting. Frozen evaporator coils are almost always caused by restricted airflow from a dirty filter or blocked vents.
- Unusual noises: Rattling suggests loose panels or debris in the outdoor unit. Grinding or squealing points to a motor bearing issue and requires professional attention.
- Water leaks indoors: A blocked condensate drain is the usual cause. Flush the drain line as described in the DIY maintenance steps above.
Pro Tip: Keep a simple log of any unusual behaviour, including the date, the symptom, and what you checked. This information saves an engineer significant diagnostic time and can reduce your service bill.
Stop DIY troubleshooting and call a certified engineer if you suspect a refrigerant leak (indicated by hissing sounds, ice on refrigerant lines, or a sudden loss of cooling capacity), if you smell burning, or if the circuit breaker trips repeatedly. These are not homeowner-level repairs.
What maintenance schedule ensures ongoing air conditioning efficiency?
A consistent maintenance schedule is what separates a system that runs well for 15 years from one that fails at year seven. Regular maintenance reduces long-term costs by extending system lifespan and preventing the energy wastage that comes from degraded components.
| Task | Frequency |
|---|---|
| Air filter inspection | Monthly |
| Air filter replacement | Every 60 to 90 days (more often with pets or high dust) |
| Condensate drain flush | Every 3 months |
| Outdoor unit debris clearance | Monthly during summer; after every storm |
| Professional service visit | Twice yearly (spring and autumn) |
| Full system efficiency check | Annually, as part of spring professional visit |
Beyond the schedule, a few habits make a significant difference. Keep the area around your outdoor unit clear year-round, not just before a service visit. Set your thermostat to a consistent temperature rather than repeatedly adjusting it, as constant cycling increases wear. If your system has a smart thermostat, use the scheduling function to reduce cooling demand during unoccupied hours.
Record every service visit, filter replacement, and fault in a simple log. A written history of your system’s maintenance is useful when diagnosing recurring faults and adds value if you sell the property. For a detailed breakdown of what a yearly professional appointment should cover, Akita’s residential HVAC maintenance checklist sets out the full scope clearly.
Key takeaways
Consistent DIY maintenance combined with twice-yearly professional servicing is the most cost-effective way to keep a residential air conditioning system running at full efficiency.
| Point | Details |
|---|---|
| Filter replacement is the highest-impact DIY task | Check monthly and replace every 60 to 90 days to maintain airflow and efficiency. |
| Professional visits should happen twice yearly | Book in early spring and autumn for refrigerant checks, coil cleaning, and electrical testing. |
| 90% of faults start with simple checks | Verify thermostat settings, circuit breakers, and filters before calling an engineer. |
| Outdoor unit clearance matters year-round | Maintain 2 to 3 feet of clear space on all sides to protect compressor performance. |
| Keep a maintenance log | A written service record helps diagnose faults faster and supports property value. |
What we see homeowners get wrong about AC servicing
The most common mistake we see at Akita is homeowners treating air conditioning servicing as a reactive task rather than a scheduled one. They call us in July when the system has stopped cooling, and nine times out of ten, the root cause is a filter that has not been changed since the previous summer or a condensate drain that has been blocked for months. Both are five-minute fixes that cost nothing when caught early and several hundred pounds when they cause secondary damage.
The second mistake is conflating a filter change with a full service. Changing the filter yourself is genuinely useful and we encourage it. But it does not replace a professional inspection of the refrigerant circuit, electrical connections, and coil condition. These are the components that fail silently and expensively. A system can appear to be cooling adequately while running at 30% below its rated efficiency because of low refrigerant or dirty coils. You will not notice until the energy bill arrives.
We also see homeowners skip the spring booking because they assume the system is fine after a quiet winter. That is precisely the wrong logic. Winter inactivity allows condensate drain lines to develop algae growth, outdoor units to accumulate debris, and electrical connections to corrode. The pre-summer professional check exists for exactly this reason. Book it before May and you will almost always avoid the summer emergency queue entirely.
— Akita
Let Akita handle the professional side
Akita provides fixed-price air conditioning servicing for homeowners across Suffolk, Norfolk, and Essex. Our engineers are F-Gas certified and carry out full system inspections covering refrigerant levels, coil cleaning, electrical testing, and thermostat calibration. If you want the DIY tasks covered in this guide handled professionally, or if you are considering a new domestic air conditioning installation, our team offers transparent pricing and flexible booking with no hidden charges. Contact Akita to arrange your spring service appointment or to discuss a new system that fits your home and budget.
FAQ
How often should I service my air conditioning unit?
Most residential systems benefit from two professional service visits per year, ideally in early spring and autumn. DIY tasks such as filter checks and drain flushing should be carried out monthly or every three months depending on the task.
Can I service my air conditioner myself?
Homeowners can safely clean or replace filters, clear outdoor unit debris, flush condensate drain lines, and check thermostat settings. Refrigerant handling, electrical testing, and compressor assessment require a certified engineer and cannot legally be performed without F-Gas certification in the UK.
What causes an air conditioner to stop cooling properly?
The most common causes are a blocked air filter, frozen evaporator coils, a tripped circuit breaker, or a failed run capacitor in the outdoor unit. Start with simple checks before calling a professional, as the majority of faults are resolved without an engineer visit.
How do I know if my AC needs a professional repair rather than DIY maintenance?
Call a certified engineer if the circuit breaker trips repeatedly, if you hear grinding or squealing noises, if you suspect a refrigerant leak, or if the system fails to cool after you have checked the filter, thermostat, and power supply. For further guidance, Akita’s AC troubleshooting guide covers the most common UK fault scenarios in detail.
Does regular maintenance actually reduce energy bills?
Yes. A clean filter alone can reduce energy consumption noticeably, and a full professional service that restores refrigerant levels and cleans coils can bring a degraded system back to its rated efficiency. Consistent maintenance is the most reliable way to reduce operating costs over the system’s lifetime.