

Homeowners: Outdoor Unit Placement with Installer Checklist
Put your outdoor unit on a level, solid base with clear airflow on all sides, away from bedroom windows and boundary fences. As a rule of thumb, allow at least 1 metre in front of the fan, 300mm at the sides and rear, and 1.5 metres above if anything overhangs it, plus extra space for a technician to work. Always check the manufacturer’s datasheet against these figures and get a proper site survey before you commit to a spot.
TL;DR:
- Proper outdoor placement requires at least 1 meter of clearance in front, 300mm at sides and rear, with 1.5 meters overhead if overhangs exist, to prevent recirculation and ensure efficiency.
- Shaving even a small amount from manufacturer’s recommended clearances can reduce efficiency by up to 30%, affecting the unit’s performance and warranty validity.
- Choices like positioning near walls or in tight alcoves can cause noise reflection and airflow restriction, increasing noise levels and maintenance complexity.
- Placing units on uneven ground, without vibration isolation, or in poorly accessible locations can accelerate wear, complicate servicing, and increase long-term costs.
- Consulting a professional installer for a site survey ensures accurate clearance measurements, structural suitability, and noise compliance, reducing costly mistakes.
Table of Contents
- Why outdoor unit placement affects airflow, efficiency and equipment life
- What are the minimum clearance distances for an outdoor unit?
- Where should you actually put it: side, garden, driveway or roof?
- How should the unit be mounted: ground pad, bracket or wall fixing?
- How do you reduce outdoor unit noise without blocking airflow?
- What maintenance access does the placement need to allow?
- When should you bring in a professional installer?
- Akita’s perspective: what installers actually check on-site
- The trade honest opinion on outdoor unit placement
- How Akita can help you get outdoor unit placement right
- Sources
Why outdoor unit placement affects airflow, efficiency and equipment life
An outdoor condenser or heat pump unit works by pulling air across a coil and pushing it back out the other side. Box that airflow in, and the machine has to work harder to move the same amount of heat. That extra strain shows up in three places: your energy bill, the compressor, and eventually the unit’s lifespan.
Recirculation is the technical term for warm exhaust air getting sucked straight back into the intake, and it’s the single biggest performance killer poor placement causes. Installer guidance suggests recirculation from tight spacing can cut efficiency by up to 10 to 30%, which is a huge swing for something as simple as moving a unit 20cm further from a wall. Left unchecked, it can also trigger safety cut outs as the system tries to protect itself from running too hot.
Placement has knock-on effects most homeowners never think about until the installer arrives:
- Poor airflow forces the compressor to cycle on and off more often, a pattern called short cycling that wears components out faster
- A cramped or awkward spot means longer refrigerant pipe runs, more trenching, and a trickier route for the condensate drain
- Units mounted close to hard, reflective surfaces (fences, rendered walls, glass) bounce noise back at both your home and your neighbour’s
- Vibration transmitted through a poorly isolated base can travel into the building structure and become audible indoors
None of this is exotic engineering. It’s physics and plumbing, and it’s exactly why the position you choose before installation matters more than almost any other decision in the process.
What are the minimum clearance distances for an outdoor unit?
Manufacturers publish exact clearance figures for a reason: fall short of them and the unit simply won’t perform to its rated efficiency, and you risk voiding the warranty. Industry guidance aligned with MCS 020 standards sets out sensible starting minimums, though every model has its own datasheet and the numbers can vary.
As a working baseline:
- Front of the fan (intake/exhaust): at least 1 metre (3.3ft) of clear space, more if a wall or fence sits directly opposite
- Sides and rear: minimum 300mm, though 500mm gives you far more breathing room and easier servicing
- Above the unit: 1.5 metres recommended if there’s a balcony, eave or canopy overhead
- Between two units on the same wall: at least 300mm to stop one unit’s exhaust feeding the other’s intake
Quick fact: field data cited by installers shows that shaving clearance below these minimums isn’t a small compromise. It’s the difference between a unit running at its rated output and one clawing back lost capacity every cycle, sometimes losing close to a third of its efficiency in the process.
It’s worth separating two different numbers here. The absolute minimum is the smallest gap the manufacturer says the unit can technically tolerate without failing. The service clearance is what an engineer actually needs to remove panels, replace a fan motor, or run diagnostics without dismantling half your garden. These are rarely the same figure, and a good installer will design for the second, not just the first.
When you’re preparing for a site survey, write down the exact clearance table from your chosen unit’s installation manual, not a generic guide. Carrier’s own installation guidance stresses a shaded, well-ventilated spot on a solid, level surface free of obstructions, and that phrasing appears in almost every major manufacturer’s documentation because it covers the fundamentals that matter regardless of brand.
Where should you actually put it: side, garden, driveway or roof?
Every property throws up a different set of compromises, and there’s rarely a perfect spot. Here’s how the realistic options stack up.
-
Side of the house. Usually the shortest pipe run back to the indoor unit, which keeps installation costs down and refrigerant charge efficient. The catch is that narrow side passages between houses can bounce noise straight into a neighbour’s window, so this is where reflected sound becomes a real issue rather than a theoretical one.
-
Back garden. Generally the best all-rounder for noise setback, drainage, and having room to work. You get distance from the street and from close neighbours, and usually more flexibility on base construction. The trade-off is longer pipework and, in colder regions, a slightly higher risk of frost or icing around an exposed base if it isn’t raised properly.
-
Driveway or footpath edges. Tempting because the ground is already flat and hard, but condensate dripping onto a walked surface is a genuine slip hazard once temperatures drop. If this is your only option, route the condensate drain well clear of the path rather than letting it run across it.
-
Roof or elevated platform. Puts real distance between the unit and ground-floor neighbours, which helps with noise complaints in terraced or semi-detached properties. It demands a structural check on load-bearing capacity and secure anti-vibration fixings, because a rooftop unit that isn’t properly braced becomes both a noise problem and a safety one.
-
Alcoves and tight corners. Almost always the worst choice unless you significantly increase clearance beyond the minimums. Enclosed spaces trap warm exhaust air and feed it straight back into the intake, which is the exact recirculation problem clearance rules exist to prevent.
Longer pipe runs from a garden or roof position aren’t free, either in materials or labour, and it’s worth reading up on what a full installation typically costs before you settle on a spot that looks convenient but adds metres of copper pipe to the job.
How should the unit be mounted: ground pad, bracket or wall fixing?
Getting the base right matters as much as picking the location. A unit sitting on an uneven or shifting surface will vibrate more, drain badly, and wear out its internal components faster.
Ground-mounted units typically sit on a concrete plinth or a set of polymeric anti-vibration pads. A concrete base should be poured to a consistent thickness (100mm is a common trade standard) and levelled to within a few millimetres, because even a slight tilt affects how oil circulates inside the compressor. Polymeric pads are a faster, often preferred alternative on softer ground, and they double as basic vibration isolation.
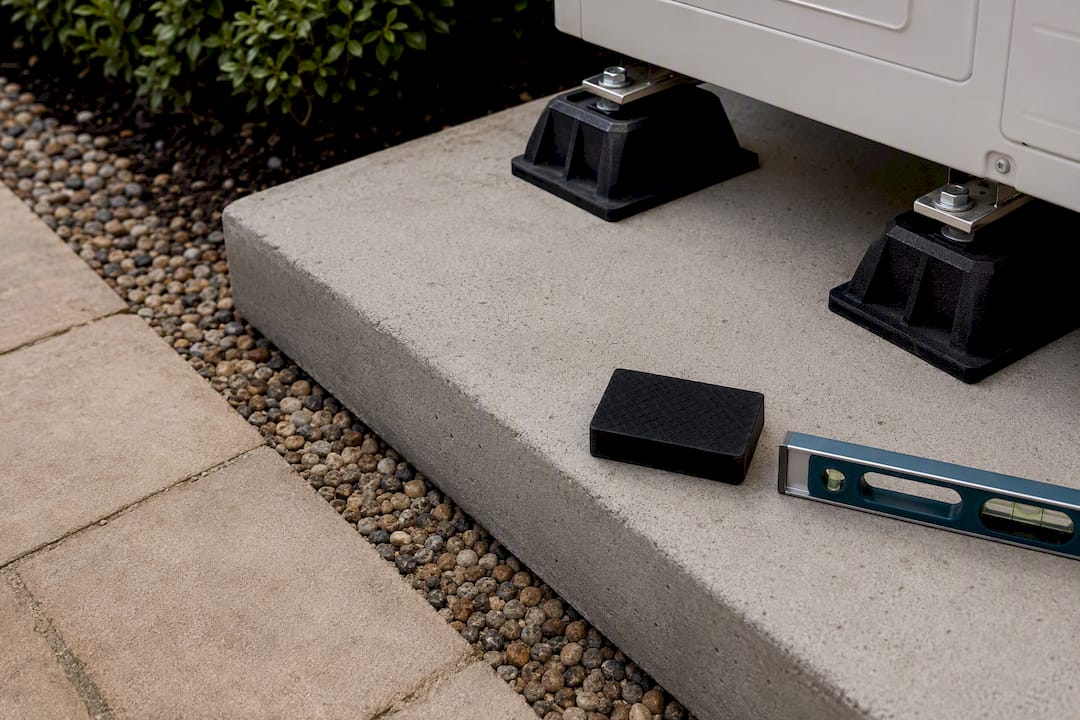
Wall brackets are acceptable in the right circumstances, but they’re not a default choice. Trade experience shared among installers shows wall mounting cuts down ground-borne vibration, which sounds like a win, but it demands a proper structural check first. Cavity walls, render, and older brickwork don’t always take fixings well, and a badly anchored bracket will transmit compressor vibration straight into the room behind it.
A few practical points worth building into any installation:
- Add rubber or spring anti-vibration mounts between the unit’s feet and the base, regardless of whether it’s ground or wall mounted
- Raise the base roughly 100mm above surrounding ground level to avoid flooding, standing water and frost heave
- Slope the surrounding ground slightly away from the unit so condensate and rainwater drain rather than pool underneath it
- Keep the base clear of leaves, grass clippings and mulch, which trap moisture against the casing over time
Pro Tip: If you’re on clay soil or somewhere prone to ground movement, ask your installer about a floating pad rather than a fixed concrete plinth. It flexes with minor ground shifts instead of cracking, which saves you a re-level job two winters later.
How do you reduce outdoor unit noise without blocking airflow?
Noise complaints from neighbours are one of the most common reasons air conditioning and heat pump installations run into trouble after the fact, and a government-commissioned review of heat pump noise found that proximity to neighbours and reflecting surfaces are the leading causes of objections and planning rejections. The instinct is to box the unit in with a solid fence, but that’s usually the worst thing you can do, since it traps warm air and forces the unit to work harder, which makes it louder, not quieter.
Better options include:
- Orient the unit so its exhaust doesn’t face directly at a neighbour’s window or your own bedroom
- Use open, louvred acoustic screening or a porous evergreen hedge rather than a solid close-fitting barrier
- Combine screening with distance. Insight from planning-focused acoustic research shows setback and screening work best together, not as substitutes for one another
- Reserve acoustic hoods or specialist enclosures for genuinely difficult sites; they reduce noise but usually also reduce airflow, so they need sizing by someone who understands the trade-off
If you’re placing a unit near a bedroom, it’s worth reading through dedicated guidance on quiet air conditioning for sleeping areas before you finalise the spot, since the acceptable noise threshold for a room you sleep in is stricter than for a lounge or office.
What maintenance access does the placement need to allow?
The spot you choose today decides how easy, and how expensive, every future service visit will be.
- Leave real working clearance, not just the technical minimum. Engineers need room to remove side panels and access the electrical isolator safely, and a good service report should note the measured clearances on file.
- Clear vegetation and debris regularly. Grass, leaves and hedge trimmings around the base restrict airflow gradually, so what started as a compliant installation can drift out of spec within a couple of seasons.
- Check the condensate drain each autumn and spring. A blocked drain causes pooling around the base and, in winter, ice that can crack pipework or become a hazard underfoot.
- Inspect for ice build-up in cold months. Units placed under eaves or near downpipes are especially prone to icing, and condensate should always be routed away from paths, not across them.
Placement choices you make now directly shape your ongoing running costs too. A unit that’s hard to reach gets serviced less often, and a unit fighting recirculation every day works harder for the same output. A structured maintenance routine becomes far easier, and cheaper, when access was designed in from day one.
When should you bring in a professional installer?
Some sites are straightforward enough to plan yourself with a tape measure and the datasheet in hand. Others aren’t, and getting it wrong isn’t a small mistake.
Call in a professional rather than attempting a DIY placement if any of the following apply:
- The only realistic spot is close to a neighbour’s window, boundary, or shared wall
- You’re considering a tight alcove, an enclosed courtyard, or anywhere airflow is restricted on more than one side
- A roof or elevated mount is on the table, which needs a structural assessment before anything gets fixed
- Your local authority has noise limits or planning restrictions that apply to external plant
A competent installer should hand you a proper site-survey report with measured distances, not a verbal assurance that “it’ll be fine.” Ask what compliance checks they run and whether they document clearance figures against the unit’s actual datasheet. It’s also worth asking early whether the chosen spot adds cost through longer pipe runs, structural brackets, or trenching, since these are the extras that turn a straightforward quote into a much bigger invoice partway through the job.
Akita’s perspective: what installers actually check on-site
The placement problems Akita’s engineers encounter most often aren’t exotic. They’re units squeezed into side alleys with barely 200mm of clearance, condensate draining straight onto a shared path, or a bracket fixed to a wall nobody checked for structural suitability first. Every one of those is fixable at the design stage and expensive to fix afterwards.
A proper site survey measures actual clearances against the unit’s datasheet, checks whether the wall or base can take the fixings, and maps noise risk against the nearest windows, not just the nearest boundary line. That combination catches the problems a quick look at a garden never will.
The corrective work is usually simple once it’s identified: repositioning by half a metre, swapping a solid fence panel for a louvred one, or raising a base that was sitting flush with the lawn. None of it is dramatic, but all of it depends on someone actually measuring before the concrete goes down.
The trade honest opinion on outdoor unit placement
Most guidance on this topic treats clearance numbers as the whole story, and that’s where it falls short. The datasheet minimums matter, but they’re a floor, not a design plan. The judgement that actually protects performance and neighbour relations is knowing when to exceed those minimums, particularly around noise, and that’s a site-specific call no chart can make for you.
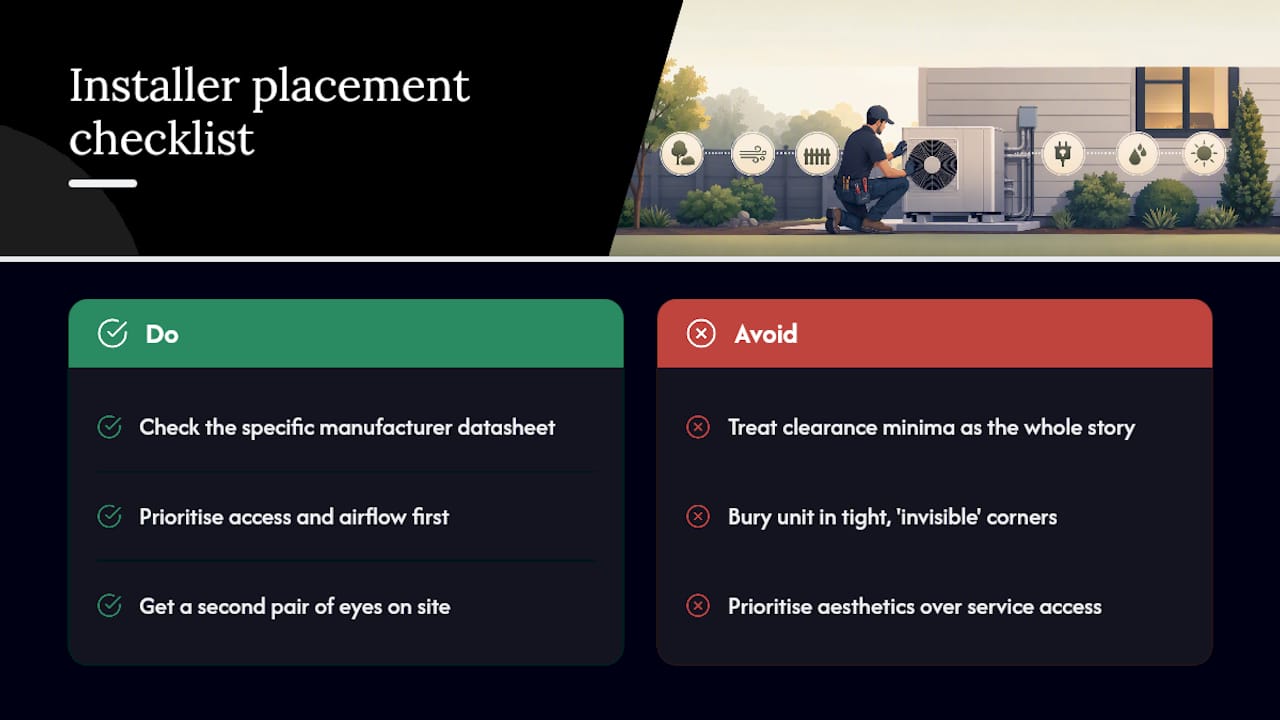
The conventional advice also underweights how much placement decisions ripple forward into maintenance. A unit shoved into a tight, “invisible” corner because it looks tidy from the street will cost more to service every single year it’s there. Prioritise access and airflow first, aesthetics a distant second.
If there’s one thing worth doing before anything else, it’s checking the actual manufacturer datasheet for your specific model rather than relying on a generic rule of thumb, then getting a second pair of eyes on the site before any concrete is poured.
— Akita
How Akita can help you get outdoor unit placement right
Professional installers offer a practical alternative to guessing at clearance figures from a forum thread. Booking a site survey provides a measured placement plan against the actual unit datasheet, photographs for records, and a compliance check against noise and access requirements, not just a rough estimate scribbled on a job sheet.

For homeowners in various regions, professional HVAC services include fixed-price installation, flexible finance, and ongoing maintenance memberships that help keep a correctly placed unit running efficiently for years rather than months. If you’re planning a new domestic installation, start with the domestic air conditioning page to see what’s involved, or head straight to the fixed-price installation option if you already know roughly what you need. Either way, the next step is booking a survey so someone measures your actual site before any decisions get made on assumptions.
Sources
- Heat pump space requirements outside the home | Axiom Eco Homes
- Heat pump installation location: placement guides | Carrier UK
- Mount outdoor unit on the wall or on the ground? | Green Building Advisor
- Review of air source heat pump noise emissions and planning guidance | DESNZ / WSP report