

Homeowners Fix Thermostat Placement: 4 DIY Checks and Installer Tips
If your home has hot and cold rooms, a system that clicks on and off every few minutes, or bills that climb without a clear reason, the thermostat itself is a prime suspect. Sunlight, vents, exterior walls and unused hallways are the four most common bad locations. Grab a room thermometer, put it beside the thermostat for twenty minutes, and compare readings. A gap of more than a degree or two usually confirms placement is the culprit, and most of these problems are fixable without replacing anything.
TL;DR:
- Proper thermostat placement around 1.5 meters on an interior wall in a central, frequently used room is crucial for accurate temperature reading.
- Avoid installing thermostats near direct sunlight, vents, exterior walls, or heat sources like radiators and ovens to prevent false readings that cause short-cycling.
- Using a room thermometer to compare readings at different times of day helps confirm placement issues and identify false signals, especially in rooms that feel uncomfortable.
- Relocating a thermostat without proper wiring checks can cause system stress, so hiring a professional for wiring compatibility and heat pump controls is recommended.
- Temporary fixes like shading from sunlight or repositioning furniture can improve accuracy, but a permanent solution involves proper placement and possibly new wiring or sensor integration.
Table of Contents
- Common thermostat placement problems: the spots to avoid
- How to diagnose thermostat placement problems yourself
- How poor placement drives up energy bills and discomfort
- Practical fixes and a relocation checklist
- What installers check before relocating or rewiring a thermostat
- An installer’s view on what actually fixes these problems
- How Akita can help with placement, wiring and relocation
- Further technical reading
- Sources
- FAQ
Common thermostat placement problems: the spots to avoid
A thermostat only knows what its sensor tells it, and a sensor in the wrong spot constantly lies. Direct sunlight through a window is the classic offender: the sensor heats up faster than the room around it, so the system thinks the house is warmer than it actually is and cools when nobody needs it. The same distortion happens in reverse near a draughty window or door.
Airflow is the second big trap. A thermostat mounted near a supply vent gets blasted with conditioned air the moment the system starts, so it reads the temperature it just created rather than the temperature the room settles at. Sit one above a radiator, a lamp, or a television and you get the opposite problem: constant false heat readings that shut the system down too early.
Exterior walls carry outdoor temperature swings straight through the plaster, feeding the sensor a skewed baseline all day. And a thermostat stuck in a hallway or spare room measures a space nobody actually lives in, which explains why the lounge feels cold while the display insists everything is fine.
The locations to avoid, in short:
- Windows and walls that catch direct sunlight for part of the day
- Supply or return vents, and anywhere air blows directly onto the unit
- Exterior walls, especially uninsulated ones
- Near radiators, ovens, lamps, or other heat-producing appliances
- Draughty spots by doors and windows
- Hallways, landings, or rooms that are rarely occupied
How to diagnose thermostat placement problems yourself
Before you touch any wiring, run these checks. They take an evening and tell you almost everything you need to know.
- Compare readings. Place a calibrated thermometer next to the thermostat and one or two more in rooms that feel consistently too hot or cold. Let them settle for 20 to 30 minutes, then compare.
- Run the tape test. Temporarily cover the thermostat’s sensor with a small piece of card or tape for a few minutes while the system runs, and watch whether it triggers a cycle that seems disconnected from how the room actually feels.
- Log the cycling pattern. Note how often the system switches on and off over a couple of hours. Cycles shorter than ten minutes, especially repeated ones, point to a sensor reacting to something other than the room’s real temperature.
- Check for obstructions. Furniture, curtains, or a nearby lamp can all throw off a reading that otherwise looks like a wiring fault.
Pro Tip: Do the thermometer comparison at two different times of day, once mid-morning and once in the evening. A thermostat that reads accurately at 8pm but is 3 degrees off at noon is almost certainly catching afternoon sun.
How poor placement drives up energy bills and discomfort
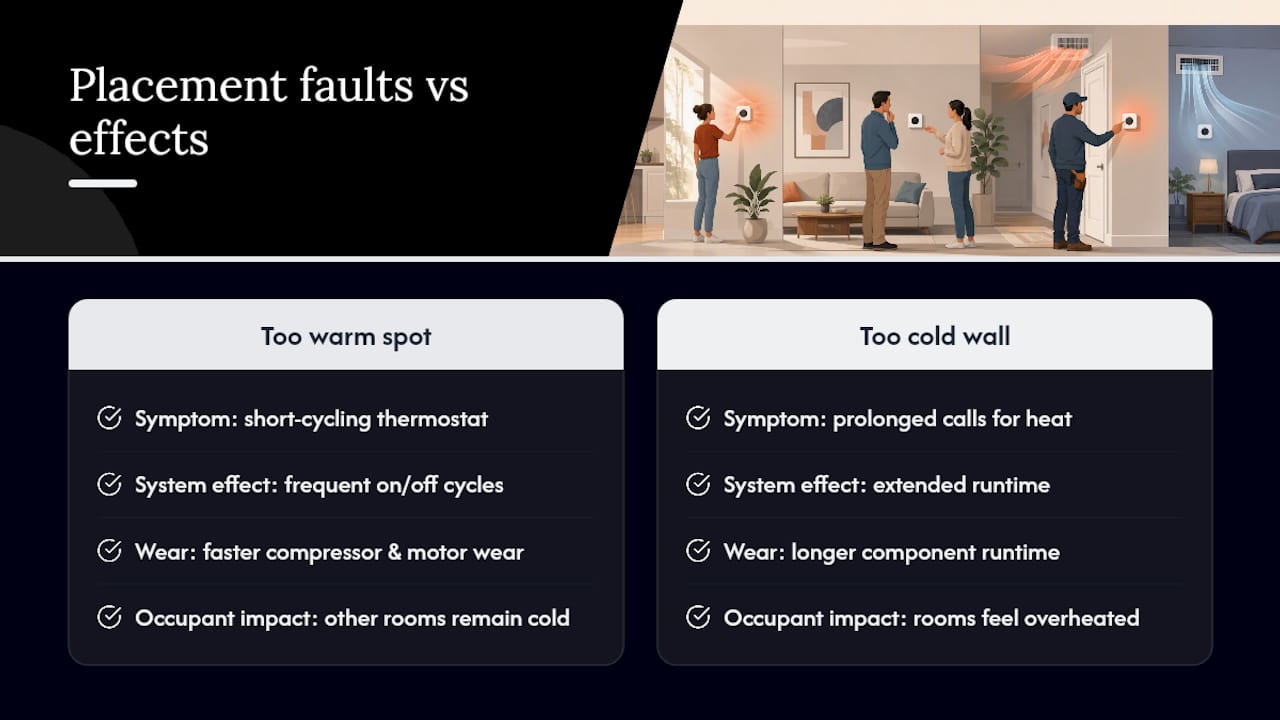
Short-cycling is what happens when a thermostat gets a false “warm enough” or “cold enough” signal too early and shuts the system down before the rest of the house has actually reached temperature. It’s a direct consequence of a biased sensor, and it wears out compressors and motors faster than a normal run cycle would. A thermostat parked near a heat source triggers this constantly, switching the system off while other rooms are still cold, then firing it back up minutes later once the sensor cools down again, as installer guidance on misplaced HVAC thermostats explains.
The opposite fault, a thermostat on a cold external wall, does the reverse: it keeps calling for heat or cooling long after the rest of the home is comfortable, driving up runtime and cost.
Sensor placement studies on multi-zone buildings found unmet heating and cooling hours could vary greatly depending purely on where sensors sat and how they were distributed, according to modelling published by the US Department of Energy’s research office. Separate peer-reviewed work on office buildings found that sensor location choices could shift heating energy use noticeably, alongside significant swings in occupant comfort, per research in Energy and Buildings.
That’s not a rounding error. It’s the difference between a system that runs efficiently and one that fights itself all winter.
Practical fixes and a relocation checklist
Not every fix means drilling a new hole in the wall. Try the cheap options first.
Short-term fixes:
- Close blinds or fit a simple shade if sunlight hits the thermostat at certain times of day
- Shield it from a nearby vent with a small deflector, or reposition furniture blocking natural airflow
- Adjust the differential or temperature offset in the settings menu, many smart thermostats let you nudge the reading by a degree or two to compensate
- Add a remote sensor if your system supports one, so the thermostat averages a reading from a more representative room
Permanent fix: the installer-recommended location is an interior wall in a central, frequently used room, mounted around 1.5 metres above the floor, well clear of vents, doorways, and direct sun. That height and position give the sensor the most honest read of how the home actually feels.
Before you move it, check:
- Whether your current wiring includes a neutral (C-wire), which most smart thermostats need
- Whether an RF receiver near the boiler is a better route than running new cable
- Wi-Fi signal strength at the new location, since a dead spot defeats a smart thermostat’s remote features
Pro Tip: If moving the thermostat means running new cable through a wall or ceiling void, treat that as a job for a qualified electrician rather than a weekend project. Relocation that changes the circuit is often notifiable work.
Call a professional once you’re dealing with new wiring runs, a fused spur, or a heat pump system, mismatched controls on a heat pump can cause real mechanical stress, not just discomfort.
What installers check before relocating or rewiring a thermostat
A visit from a qualified engineer isn’t just about mounting a new box on the wall. Heat pumps in particular need compatible controls: an on/off thermostat designed for a gas boiler can force a heat pump to short-cycle in a way that stresses the compressor and can affect the warranty, as compatibility guidance from HVAC technical resources points out.
Wiring is the next thing an installer verifies. Many older homes only have a 2-wire switched-live setup with no neutral, which rules out most smart thermostats without either new cable or an RF receiver at the boiler. In a home with an S-Plan or Y-Plan system, the wiring behind the thermostat looks completely different again, so confirming the system type before ordering hardware saves a wasted trip.
Shared thermostats are a common failure point in homes with multiple zones. One sensor simply cannot represent an upstairs bedroom and a ground-floor lounge at the same time, which is why professionals often plan a distributed sensor layout rather than relying on a single control point, a topic covered in more depth in our guide to HVAC zoning.
Before booking, gather:
- A photo of the existing thermostat wiring terminals
- The make and model of your boiler or heat pump
- A note on which rooms feel worst affected and when
An installer’s view on what actually fixes these problems
Most call-outs for uneven heating trace back to the same handful of mistakes: a thermostat over a radiator, one baking in afternoon sun, or one stuck in a hallway nobody uses. A single relocation to an interior wall usually solves it in one visit.
A photo of the wiring and a two-line description of the symptoms cuts diagnostic time before an engineer even arrives. Full zone redesigns are rarely needed. They’re worth it only when a house has genuinely distinct heating zones that one sensor was never going to serve.
— Akita
How Akita can help with placement, wiring and relocation
Some of these fixes are genuinely DIY, closing a blind, adjusting an offset, adding a remote sensor. Others involve wiring behind a wall, checking heat pump compatibility, or redesigning a zone layout, and that’s where guessing gets expensive or unsafe.

Professional installers carry out site surveys in the local region, identifying exactly why a thermostat is misreading before any wall gets touched. That includes relocation to a proper interior wall position, running new wiring where needed, integrating smart thermostats correctly with heat pump systems, and fitting distributed sensors for homes with more than one zone. A quote starts with a short conversation about your system and symptoms, often the same photos an installer would ask for anyway, wiring terminals, boiler model, and which rooms feel wrong. For ongoing issues rather than a one-off fix, the Air Conditioning Maintenance service covers regular checks so a placement problem gets caught before it turns into a comfort complaint. If you’re dealing with short-cycling, uneven rooms, or a thermostat you no longer trust, contact a qualified HVAC service provider for a survey and a straight answer on what it will take to fix it properly.
Further technical reading
- Sensor placement and unmet‑hours impact — OSTI research record
- Optimal sensor placement in buildings — Energy and Buildings, 2019
- Smart thermostat wiring guidance for combi, system and heat pump setups
Sources
- Optimal sensor placement strategy for office buildings using clustering algorithms — Energy and Buildings (2019)
- Optimal sensor placement and impact assessments — OSTI record
- Signs your HVAC thermostat is placed in the wrong location — Sun Heating
FAQ
Where should you never place a thermostat?
Avoid direct sunlight, supply or return vents, exterior walls, spots near radiators or other heat-producing appliances, and hallways or rooms that see little use. Each of these feeds the sensor a false reading and causes the system to run at the wrong times, as installer guidance on thermostat placement explains.
What are the signs that your thermostat is faulty or badly placed?
Short cycling, a reading that doesn’t match how the room actually feels, uneven temperatures between rooms, and rising bills without a clear cause are the main warning signs. Comparing the thermostat’s reading against a separate room thermometer for 20 to 30 minutes usually confirms whether placement or the unit itself is at fault.
Is it best to leave the thermostat at one temperature?
Holding a steady, moderate setting generally causes less wear than large swings up and down, since it avoids repeated full-power start-ups. If your thermostat is badly placed, though, even a steady setting won’t stop uneven rooms, the location needs fixing before the setting matters much.
How do you tell if a thermostat is reading accurately?
Place a calibrated thermometer beside it and let both settle for 20 to 30 minutes before comparing. A difference of more than a degree or two, especially one that changes depending on the time of day, points to placement rather than a faulty sensor. Akita’s engineers run this exact check as the first step during a maintenance visit.