

Homeowners: Warm air, ice, hissing? Refrigerant leak symptoms to watch
If your air conditioner is blowing warm air, freezing up, or hissing from the outdoor unit, a refrigerant leak is one of the most likely causes, but not the only one. Don’t top up the refrigerant yourself. Book a qualified technician who can pressure test the system, find the leak, and repair it properly. Professional diagnostic visits for refrigerant leaks are available across Suffolk, Norfolk, and Essex.
TL;DR:
- Refrigerant leaks often show multiple symptoms, including ice on coils, oily residue, hissing sounds, and increased energy bills, which require pressure testing for confirmation.
- Topping up refrigerant is ineffective and potentially damaging because the refrigerant circulates in a sealed loop that only leaks through mechanical faults, not consumption.
- Proper leak detection involves visual inspections, pressure testing, electronic sniffers, UV dye tracing, and nitrogen pressure testing, not just recharging the system.
- Repair typically requires recovering refrigerant, fixing the leak, pressure testing, vacuuming moisture, and recharging to the correct level, with costs depending on leak location and system accessibility.
- Preventing future leaks relies on regular servicing, keeping outdoor units clear, repairing damaged pipework promptly, and scheduling annual pressure and leak checks.
Table of Contents
- Common refrigerant leak symptoms and what they look like
- Why refrigerant doesn’t ‘run out’ and topping up doesn’t fix anything
- How professionals actually find a refrigerant leak
- What to do right now, and what to tell the technician
- What the repair actually involves, and roughly what to expect
- How to lower the risk of future refrigerant leaks
- Why a qualified technician matters more than the quick fix
- Book a refrigerant leak diagnosis with Akita
- Sources
- FAQ
Common refrigerant leak symptoms and what they look like
Refrigerant leak symptoms rarely announce themselves with a single obvious clue. They usually show up as a cluster of small, annoying changes that build over days or weeks. Learning to name them properly, rather than just saying “the AC isn’t working,” makes the technician’s job faster and your bill smaller.
Here’s what to watch for:
- Warm or barely cool air coming from vents even though the system is running and the thermostat is set correctly.
- Poor dehumidification — the room feels sticky or humid despite the unit running constantly.
- Ice or frost on the evaporator coil, the refrigerant lines, or even the outdoor condenser unit.
- Hissing, bubbling, or gurgling noises near the indoor unit or along exposed pipework.
- Oily residue around fittings, valves, or joints, which is refrigerant oil that’s escaped alongside the gas.
- Longer run times, short cycling, and a jump in your electricity bill as the compressor works harder to hit the target temperature.
Not every symptom on that list points the same way. Warm air and rising bills overlap heavily with dirty filters, blocked airflow, or a failing fan motor. Ice on the coil combined with hissing is far more specific to low refrigerant, because it reflects the pressure drop that happens when gas escapes the sealed circuit. Oily residue is arguably the strongest single visual clue, since it’s a direct sign of where the gas has been leaking out. Ice on the evaporator coil and unusually high electricity use are classic low refrigerant signs, but they can also stem from poor airflow or a clogged filter, which is why pressure testing is needed to confirm the actual cause before anyone touches the refrigerant.
Why refrigerant doesn’t ‘run out’ and topping up doesn’t fix anything
Refrigerant circulates in a sealed loop. It absorbs heat indoors, releases it outdoors, and cycles back round again, over and over, without being consumed. A correctly installed system holds its full charge for years. If the level has dropped, gas has escaped somewhere, and that only happens through a leak in a joint, coil, or pipe.
That’s the problem with simply “topping up” a low system. It treats the symptom while ignoring the cause, and the mechanical consequences stack up fast:
- Lower pressure means the coil runs colder than it should, which causes ice to form and blocks airflow further.
- A compressor forced to run on low charge overheats, breaking down its internal lubricant and windings.
- Refrigerant vented into the atmosphere is an environmental cost, and handling it legally requires certified recovery equipment and training.
- You end up paying for refrigerant twice, once now and again in a few months, while the underlying leak keeps growing.
Recharging without repair risks permanent compressor damage, and running the compressor overheated is one of the most expensive failures in the whole system.
How professionals actually find a refrigerant leak
A proper diagnostic visit doesn’t start with refrigerant at all. Technicians commonly begin with airflow and filter checks first, because a surprising number of “low refrigerant” call outs turn out to be a blocked filter or a failing fan. Only once those are ruled out does the leak hunt begin.
- Visual inspection and airflow check — filters, coil condition, and fan operation are assessed before anything else.
- Pressure testing with gauges to confirm whether the system is genuinely undercharged.
- Electronic sniffers that detect trace amounts of escaping refrigerant gas at joints and fittings.
- UV dye testing, where a dye is added to the system and a UV light later reveals exactly where oil (and therefore refrigerant) has escaped.
- Nitrogen pressure testing, which pressurises the sealed loop with oxygen-free nitrogen to reveal even tiny leaks, often paired with a soap-and-water soak test on suspect joints.
- Safe recovery of any remaining refrigerant into a certified cylinder before repairs begin, as required under EPA handling rules.
Pro Tip: Ask your technician to show you the pressure gauge readings before and after the repair. A legitimate fix should bring the system back to the manufacturer’s specified charge, not just “close enough.”
What to do right now, and what to tell the technician
Ice or hissing means stop. Beyond that, a few minutes of noting details before you call saves the technician time and saves you money on the visit.
- If you see ice or hear hissing, switch the system off and keep the area clear, especially around the outdoor unit.
- Write down what you noticed and when it started — warm air only in the afternoon, hissing only at startup, ice that appeared overnight, and so on.
- Don’t attempt to add refrigerant yourself. It requires certified equipment and, in most jurisdictions, a licence to purchase and handle it legally.
- Have your system details ready: make, model, approximate age, and the date of your last service, if you know it.
That last point matters more than people expect. A technician who knows your unit is eight years old and hasn’t been serviced since installation walks in already narrowing down likely failure points.
What the repair actually involves, and roughly what to expect
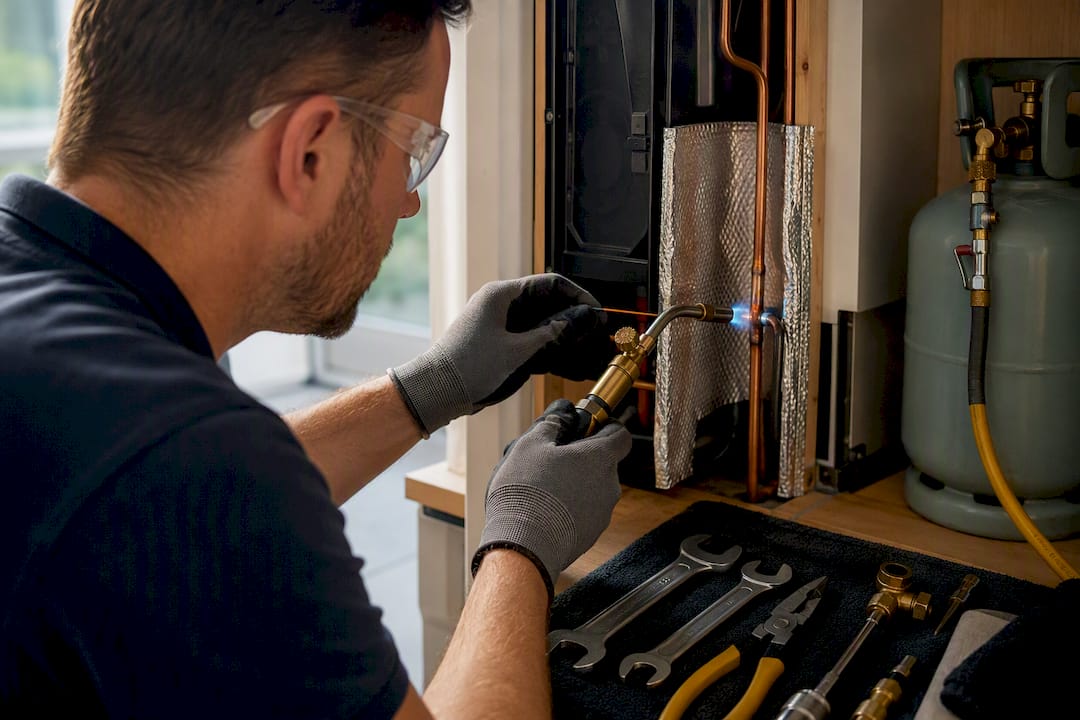
A genuine leak repair follows a set sequence, not a quick top-up. Technicians recover the remaining refrigerant, locate and repair or replace the failed component, pressure test the repair itself, pull a vacuum on the system to remove moisture and air, recharge to the correct level, then run a performance test to confirm cooling has returned to normal. Skipping the vacuum and retest step is a common shortcut that leads to repeat failures within months.
Cost and timeline depend on a handful of factors:
- Where the leak is. A joint or fitting is usually a quick fix. A pinhole in the coil itself often means replacing the coil, which costs more and takes longer.
- Refrigerant type and quantity. Older systems using legacy refrigerants can cost more to recharge than newer units on current-generation gas.
- Access and labour. A leak on an easily reached outdoor unit is far cheaper to fix than one buried in ductwork or a tight roof space.
A simple joint repair can often be diagnosed and fixed the same day, sometimes within a couple of hours. A coil replacement or a leak in a hard-to-reach spot can stretch the job into a second visit. Either way, a technician working through this sequence properly, then backing the work with a warranty, is the difference between a repair that lasts and one you’ll be paying for again by next summer.
How to lower the risk of future refrigerant leaks
Most leaks trace back to slow corrosion, vibration-loosened joints, or physical knocks to exposed pipework, all of which are cheaper to catch early than to fix after the fact. A handful of habits go a long way:
- Book an annual service that includes a pressure and leak check, not just a filter clean.
- Keep the outdoor unit clear of leaves, debris, and anything that could knock or crush the pipework, like a strimmer or a dropped tool.
- Repair damaged pipe insulation or corroded fittings as soon as you notice them, rather than waiting for a leak to develop.
- Consider a maintenance membership so inspections happen on a schedule instead of only when something’s already gone wrong.
Pro Tip: Large, sudden refrigerant loss is often physical damage to accessible pipework. Slow, gradual loss over months is usually a pinhole leak at a joint. Either way, catching it during an annual check is far cheaper than after a breakdown.
Why a qualified technician matters more than the quick fix
The instinct to “just add some gas and see if it helps” is understandable, but it treats a symptom while the actual leak keeps growing. Akita’s approach starts with proper leak detection, lawful recovery, and a pressure retest after every repair, not a top-up and a hope. Our maintenance memberships and warranty guarantees exist so problems get caught before they become expensive. If your system is showing these symptoms, book a proper diagnostic visit and work through the checklist above first.
— Akita
Book a refrigerant leak diagnosis with Akita
Akita is the direct route to getting this fixed properly, not guessed at. Our engineers diagnose refrigerant leaks using pressure testing, electronic sniffers, and UV dye tracing, then handle the recovery, repair, and recharge under one visit wherever the job allows it. We also cover eco-friendly refrigerant options if your system is due an upgrade rather than a repair, and maintenance memberships if you’d rather catch the next leak before it starts.

Expect a clear sequence on the day: visual and airflow checks first, then pressure testing and leak detection, then a straightforward quote before any work begins, no surprise costs added mid-job. Simple joint repairs are often sorted same-day. Larger jobs, like a coil replacement, get a clear timeline up front so you know what you’re waiting for. If your air conditioning is running warm, icing up, or hissing, book an air conditioning repair with Akita and get it looked at properly.
FAQ
Can Low Refrigerant Cause My AC to Freeze Up?
Yes. Low refrigerant drops pressure inside the evaporator coil, which causes moisture in the air to freeze onto it, restricting airflow and worsening the fault.
Is Hissing From My Air Conditioner Always a Refrigerant Leak?
Hissing is a strong indicator of escaping refrigerant gas, especially near joints or pipework, though it can occasionally come from a faulty expansion valve rather than a leak itself.
Can I Top Up Refrigerant Myself to Save Money?
Adding refrigerant yourself is not recommended and, in most cases, requires certification to purchase and handle legally, plus it only masks a leak that will keep getting worse.
How Long Does a Refrigerant Leak Repair Take?
A straightforward joint or fitting repair can often be completed the same day, while coil replacement or hard-to-reach leaks may need a longer timeline.
Does Akita Offer Refrigerant Leak Diagnosis?
Yes, Akita provides diagnostic visits using pressure testing, electronic leak detection, and UV dye tracing, followed by repair, recovery, and recharge for homes and businesses across Suffolk, Norfolk, and Essex.