

5 Homeowner Checks to Fix a Heat Pump Not Heating
Most heat pumps that seem to have stopped heating are fixable in minutes. Start with the thermostat mode and setpoint, check the filter for airflow blockage, and look at the outdoor unit for heavy ice. If none of that helps, you’re likely dealing with a refrigerant leak, a reversing valve or defrost fault, or an electrical problem in the compressor circuit, and that means calling a qualified engineer rather than reaching for a screwdriver.
TL;DR:
- Properly checking the thermostat, power supply, and airflow can resolve most heat pump heating issues within minutes.
- Common faults such as refrigerant leaks, reversing valve failures, or compressor problems require professional diagnosis and repair.
- Regular maintenance like cleaning or replacing filters and clearing debris around outdoor units can prevent costly breakdowns.
- During extreme cold, heat pumps naturally produce less heat, and frequent defrost cycles or ongoing ice formation indicate potential faults.
- Never attempt to open sealed refrigerant circuits yourself, as handling refrigerant requires certified technicians to avoid costly damage.
Table of Contents
- How a heat pump actually makes heat (and why airflow matters)
- Heat pump not heating: a step-by-step troubleshooting checklist
- What’s actually wrong if the basic checks don’t fix it
- When should you call a professional for heat pump repair?
- Heat pump maintenance that actually prevents no-heat calls
- Testing whether the compressor and fan are actually running
- Checking and resetting emergency heat mode
- Why extreme cold makes your heat pump work harder (or seem to fail)
- Diagnosing problems with the auxiliary electric heater
- What Akita actually checks on a heating repair visit
- What most troubleshooting guides get wrong
- Get your heat pump heating properly again
- Sources
How a heat pump actually makes heat (and why airflow matters)
A heat pump doesn’t burn anything to create warmth. It moves heat from the outside air into your home using refrigerant that cycles between the outdoor and indoor coils, as ENERGY STAR explains. A component called the reversing valve switches the refrigerant flow direction, letting the same system heat in winter and cool in summer.
The outdoor coil extracts warmth from air that might feel freezing to you but still holds usable heat. Anything that restricts airflow, whether that’s a clogged filter, a blocked outdoor coil, or low refrigerant charge, cuts directly into output. The defrost cycle briefly reverses this process to melt ice off the outdoor unit, which can make your vents blow noticeably cooler air for ten or fifteen minutes. That’s normal. Continuous cold air is not.
Heat pump not heating: a step-by-step troubleshooting checklist
Work through these checks in order. Most homeowner-fixable problems get caught in the first three steps, and manufacturer guidance from brands like Trane points to the same starting points.
- Check the thermostat first. Confirm it’s set to “heat,” not “auto” or “cool,” and that the setpoint sits at least a couple of degrees above the current room temperature. Weak or dead batteries can also cause the display to freeze or the schedule to misfire, so swap them if you’re unsure. Note down any error code showing on the display before you do anything else.
- Check the power supply. Look at your indoor breaker panel for anything tripped, and check the outdoor unit’s disconnect switch or isolation box. A blown fuse or half-tripped breaker is a common, boring, entirely fixable cause of a heat pump that won’t respond at all.
- Check airflow at the filter and vents. Pull the indoor filter and hold it up to a light; if your solar hot water isn’t heating effectively, similar airflow checks can help diagnose the problem, as explained in Solar hot water not heating? Here’s what to check first. If you can’t see light through it, replace or wash it. Walk the house and check that furniture, rugs, or closed doors aren’t blocking supply and return vents.
- Check the outdoor unit. Clear leaves, snow, or debris from around the cabinet. A light frosting is normal in cold weather, and the defrost cycle should clear it periodically. Thick ice that builds back up within an hour, or ice that never seems to melt, is a fault sign. Listen for grinding, buzzing, or knocking from the outdoor fan or compressor.
- Power-cycle only if it’s safe. If the thermostat and breakers check out but the system still won’t respond, turn the unit off at the thermostat and the breaker, wait 60 seconds, and restart. Skip this step entirely if you suspect a refrigerant leak (an oily residue near fittings, or a hissing sound) since restarting a leaking system can mask symptoms without fixing anything.
Pro Tip: Keep a note on your phone of the exact error code, when the fault started, and whether the outdoor unit was icy at the time. That thirty-second habit turns a vague “it’s not working” call into a five-minute diagnosis for the engineer who shows up.
What’s actually wrong if the basic checks don’t fix it
When thermostat, power, and filter checks come back clean and the system still won’t produce heat, the fault usually sits somewhere in the refrigerant circuit or the electrical system. These aren’t jobs for a weekend fix, but knowing what each symptom points to helps you describe the problem accurately and avoid paying for guesswork.
- Refrigerant leaks or low charge. Watch for unusually long defrost cycles, consistently weak heat even on mild days, a hissing sound near the lines, or an oily residue at joints and fittings. A technician will pressure-test the system and use gauges to compare readings against the manufacturer’s charge tables.
- Reversing valve or defrost control faults. If the unit seems stuck blowing cool air, or cycles into defrost mode far more often than it should, the valve or its control board may have failed. This is an electrical and mechanical repair, not something to attempt without training.
- Compressor or electrical faults. Breakers that trip repeatedly, a loud humming or knocking noise from the outdoor cabinet, or an outdoor fan that simply doesn’t spin while the compressor runs are all signs pointing here.
- Coil and airflow damage. A blocked outdoor coil or bent fins reduce heat transfer even when everything else works correctly. Icing that returns almost immediately after a defrost cycle finishes is one of the clearest red flags of a genuine fault rather than normal winter behaviour.
When should you call a professional for heat pump repair?
Call an engineer when you suspect a refrigerant leak, notice repeated breaker trips, hear grinding or knocking from the outdoor unit, or find ice that keeps returning within an hour of a defrost cycle. The same applies if your power-cycle reset didn’t change anything. Sealed refrigerant circuits require certified technicians by design, so this isn’t a step you can shortcut with a DIY top-up.
Before the visit, gather:
- Any error codes shown on the thermostat or outdoor unit display
- A rough timeline of when the problem started and whether it’s constant or intermittent
- The results of your own checklist (thermostat, breaker, filter, outdoor unit)
- Recent service history and any unusual noises you’ve heard
A technician will typically check refrigerant pressures against charge tables, test reversing-valve function, check defrost sensor continuity, inspect electrical connections, and assess overall compressor health.
Pro Tip: Never open the sealed refrigerant circuit yourself, even to “just check the level.” Refrigerant handling requires certification, and a botched attempt often turns a simple recharge into an expensive compressor replacement.
Heat pump maintenance that actually prevents no-heat calls
A well-maintained air-source heat pump can run for 15 to 20 years, but that lifespan depends on you not skipping the boring stuff. Small faults compound. A dirty filter today becomes strained airflow, then a struggling compressor, then a callout that costs far more than a $15 filter would have.
Monthly and seasonal tasks worth putting on a calendar:
- Clean or replace the indoor filter every one to two months, more often if you have pets
- Clear leaves, snow, and debris from around the outdoor unit
- Check the condensate drain isn’t blocked and the outdoor unit has clear space on all sides
An annual professional service should cover refrigerant pressure checks, coil and fan cleaning, electrical connection inspection, and a full defrost sequence test, ideally booked before the heating season starts rather than during the first cold snap. Skipping this service reduces efficiency over time and can affect your manufacturer’s warranty, since most warranty terms explicitly require documented annual maintenance.
Dirty filters and blocked coils don’t just risk a breakdown. They quietly add extra running cost every month as the system works harder to move the same amount of heat, a cost that’s invisible until you compare bills year over year.
Testing whether the compressor and fan are actually running
Stand near the outdoor unit while the system is calling for heat and check for three things: the fan should be visibly spinning, you should hear a low hum or steady operational sound from the cabinet, and warm air should be discharging from the top or side vents (not the same air the intake pulls in, but noticeably different in temperature).
If the fan isn’t turning but you hear a hum, the fan motor or its capacitor has likely failed while the compressor still runs. That’s a fan motor repair, not a full system replacement. If you hear nothing at all and the unit is completely silent despite the thermostat calling for heat, check the breaker and isolation switch again. Genuine compressor failure usually announces itself with either total silence, a loud grinding or knocking sound, or the breaker tripping repeatedly within seconds of startup.
One useful home test: place your hand a few inches from the supply vents indoors. If you feel airflow but no warmth at all, the fan side of the system is working while the heating side isn’t, which points toward the compressor, refrigerant charge, or reversing valve rather than a simple airflow blockage. If you feel neither airflow nor warmth, go back to checking power and the indoor blower motor first, since that’s a cheaper and more common fault than a dead compressor.
Don’t attempt to test compressor electrical windings yourself with a multimeter unless you’re trained to do so safely. Compressors run on high voltage and can retain a charge even when powered off.
Checking and resetting emergency heat mode
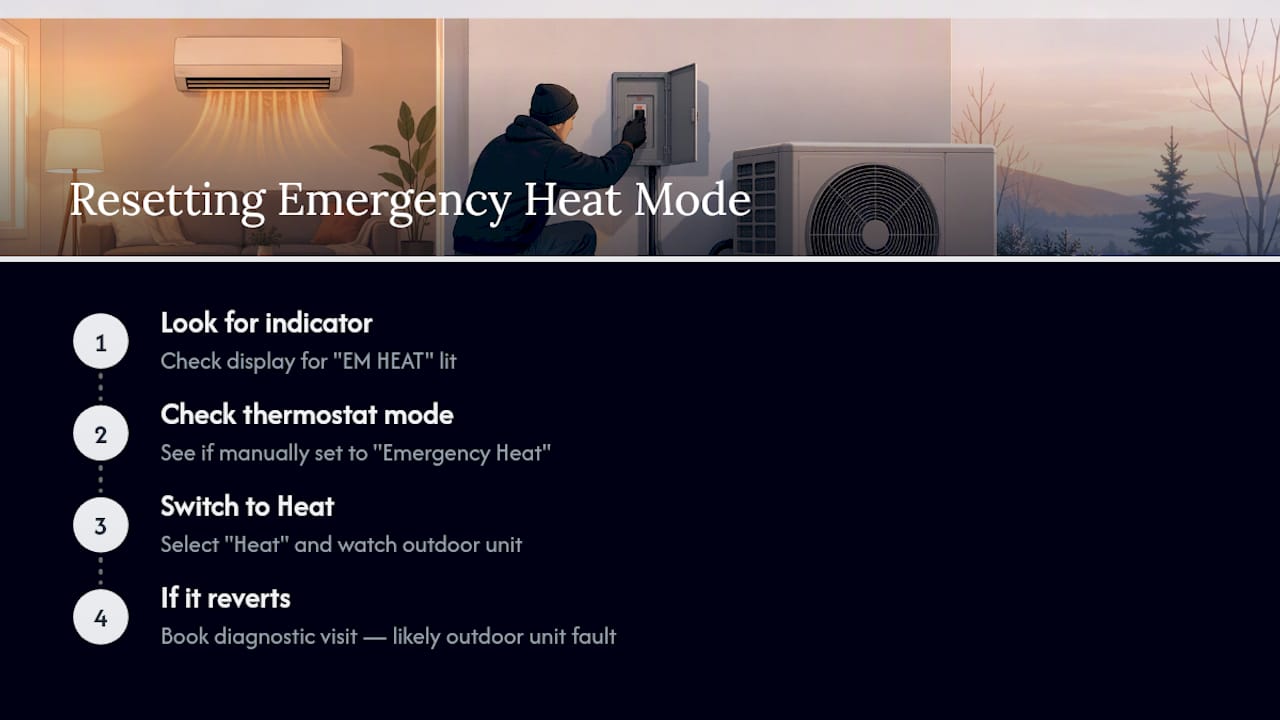
Most heat pump thermostats have an “emergency heat” or “aux heat” setting, separate from the normal “heat” mode. This switches the system to rely entirely on backup electric resistance heat, bypassing the heat pump’s compressor and outdoor unit altogether.
If your thermostat display shows “EM HEAT” or a similar indicator lit up when you didn’t select it, that’s diagnostic information worth noting, not just an inconvenience. It often means the system’s control board has detected a fault with the outdoor unit or compressor and switched to backup heat automatically to keep the house warm while masking the underlying problem.
To check the setting, look at your thermostat’s mode selector. If it’s manually set to “Emergency Heat,” switch it back to “Heat” and see whether the outdoor unit kicks in normally. If the system reverts to emergency heat on its own again within a few hours, or refuses to leave that mode, that’s a strong signal of a genuine outdoor unit fault rather than a settings mix-up.
Running on emergency heat isn’t dangerous, but it is expensive. Electric resistance heat costs considerably more to run than a functioning heat pump, so treat an unexplained switch to emergency mode as a reason to book a diagnostic visit rather than a permanent fix.
Why extreme cold makes your heat pump work harder (or seem to fail)
Heat pumps pull warmth from outside air, and that gets progressively harder as the outdoor temperature drops. Below roughly 25 to 30°F, most standard heat pumps see a real drop in heating capacity, which is a physical limitation of the refrigeration cycle rather than a fault.
This is exactly where auxiliary electric heat is designed to step in, topping up the heat pump’s reduced output rather than replacing it. If your system feels like it’s “not heating properly” specifically during a cold snap, but worked fine the week before at milder temperatures, that’s often expected behaviour, not a breakdown.
Longer and more frequent defrost cycles are also normal in extreme cold, since more moisture in the air means more frost building up on the outdoor coil. If defrost cycles run so often that the house never quite reaches setpoint, or ice keeps building back within twenty minutes of clearing, that crosses from “normal cold-weather strain” into “needs a technician” territory.
Diagnosing problems with the auxiliary electric heater
Many heat pump systems include a backup electric heating element, sometimes called auxiliary or supplemental heat, housed in the indoor air handler. It’s separate hardware from the heat pump itself, with its own circuit breakers, usually a dedicated double-pole breaker rated for a higher amperage than the rest of the system.
If your thermostat display shows aux heat running but the air coming from the vents stays lukewarm or cold, check the dedicated breaker for that heater first. It’s common for this breaker to trip independently of the main system breaker, especially after a power surge, and homeowners often miss it because the rest of the heat pump appears to be running normally.
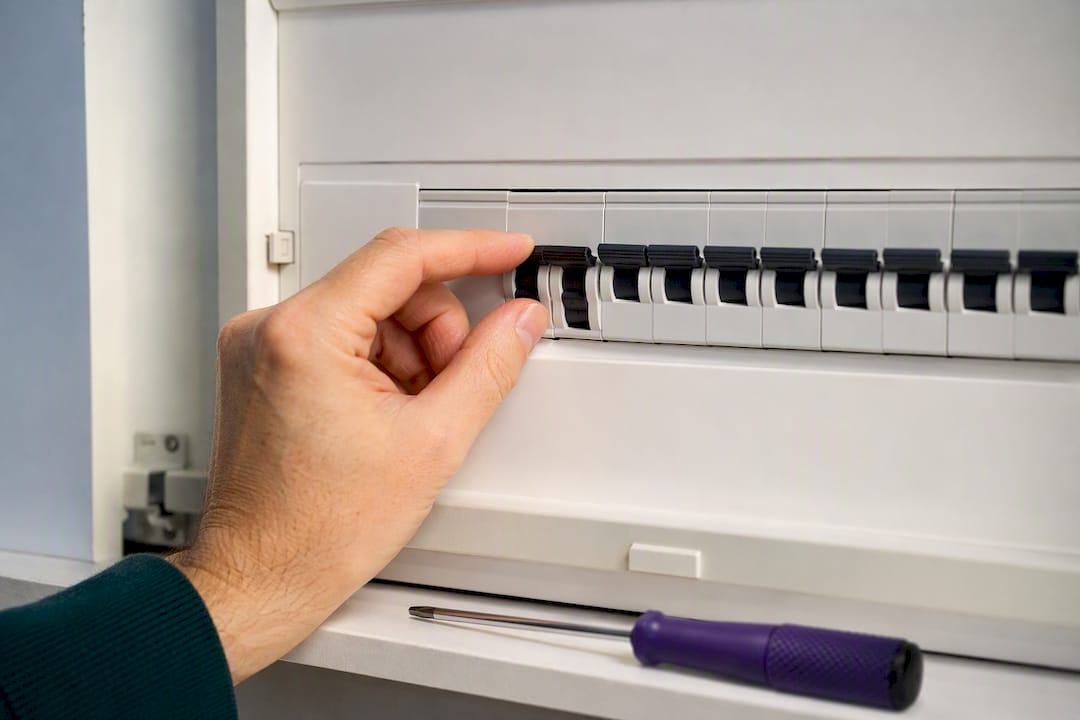
A heating element that never engages at all, even when the thermostat calls for it during a cold snap, may have a blown internal fuse or a failed relay. This is worth mentioning specifically when you call a technician, since it narrows the fault to a component that’s often cheaper and faster to replace than anything in the refrigerant circuit. Persistent short-cycling of the aux heat, where it kicks on and off rapidly, is another detail worth reporting rather than diagnosing yourself, since it can indicate a failing limit switch or airflow restriction on the indoor side.
What Akita actually checks on a heating repair visit
A heat pump callout with Akita starts with the same diagnostic steps outlined above, just with the right gauges and training behind them. Engineers check refrigerant pressures against manufacturer charge tables, test the reversing valve and defrost sensors, and inspect electrical connections before touching anything sealed.
Before booking, it helps to have a few things ready:
- Any error codes from the thermostat or outdoor unit display
- A note of which checks you’ve already run yourself
- Clear access to both the indoor air handler and outdoor unit
Ongoing maintenance memberships exist specifically to catch the small faults, a slightly clogged coil, a defrost sensor drifting out of tolerance, before they turn into a no-heat emergency in January. Regular servicing also keeps you within most manufacturers’ warranty terms, which usually require documented annual maintenance to stay valid.
What most troubleshooting guides get wrong
Most advice on a heat pump not heating treats the outdoor unit as a black box: check the filter, check the thermostat, then jump straight to “call a professional” with no middle ground. That gap is where homeowners either give up too early on a $15 filter fix or delay a genuine refrigerant fault for weeks because nobody told them what a hissing sound near the lines actually means.
The detail that gets skipped most often is what to write down before the technician arrives. An error code, a rough timeline, and a note on whether the ice cleared after defrost turn a callout from a two-hour diagnostic hunt into a focused repair. That’s not a minor convenience. It’s often the difference between one visit and two.
The other overlooked point is emergency heat mode. Homeowners frequently notice their bills spike, assume the heat pump is simply inefficient, and never realise the system quietly switched to backup electric heat weeks earlier because of an unresolved fault. Checking that indicator light should happen before any other diagnostic step, not after.
— Akita
Get your heat pump heating properly again
A qualified engineer checks refrigerant pressure, reversing valve function, and electrical connections in one visit, with fixed pricing agreed before any work starts. That matters when a no-heat callout during a cold spell is the last thing you want dragging on for days while you wait on quotes.
If you’ve been through the checklist above and the system still won’t hold heat, or you’d rather skip straight to a proper diagnostic visit, Akita’s domestic air conditioning and heat pump service covers installation, repair, and ongoing maintenance across the systems this guide describes. For homes overdue on servicing, it’s worth checking what a professional visit typically covers and costs before your next cold snap arrives. Book a visit, get your system properly checked, and stop guessing at error codes on your own.
Sources
- Heat pump not heating? Troubleshooting cold air issues | Carrier
- Troubleshooting tips for a heat pump not heating | Trane
- Heat pump servicing and maintenance explained | The Independent