

AC not turning on? Here's what to check first
If your AC won’t turn on, the fault is almost always one of three things: no power reaching the unit (a tripped breaker or blown fuse), a thermostat problem (wrong mode, dead batteries, or a blank display), or blocked airflow from a clogged filter or full condensate drain. Start by checking your thermostat display within the next two minutes. If it is blank, that tells you more than any other single check. If it is lit and set correctly, move to your breaker panel next.
Do not touch anything inside the outdoor unit’s electrical panel or attempt to test live wiring yourself. Electrical faults and refrigerant handling both carry real risk and, in many cases, legal restrictions on who can work on them.
The likeliest fixable causes, in order of how often they turn up:
- No power: tripped breaker, blown fuse, or the outdoor disconnect switch pulled or flipped off
- Thermostat fault: dead batteries, wrong mode (heat instead of cool), or a setpoint above room temperature
- Blocked airflow or drain: a clogged filter starving the system, or a full condensate pan tripping the safety float switch
Key Takeaways
Most AC startup failures trace back to power, thermostat, or airflow faults that a homeowner can safely check within minutes, while compressor and refrigerant issues typically require a licensed technician.
| Point | Details |
|---|---|
| Check the thermostat first | Confirm mode, setpoint, and batteries before assuming a bigger fault exists. |
| A repeat breaker trip is a warning | One trip may be nothing; a breaker that trips immediately again signals a failing component. |
| Condensate float switches cause silent shutdowns | A full drain pan can lock out the whole system as a safety feature, not a fault. |
| Never test refrigerant or open electrical panels yourself | Refrigerant handling needs certification, and live electrical testing carries real risk. |
| Akita offers fixed-price diagnostics | A single visit identifies the fault and gives a repair quote before any work starts. |
Table of Contents
- Quick AC troubleshooting checklist to run through now
- Why does your AC unit refuse to start?
- How to run each safety check properly
- When should you stop and call a professional?
- Maintenance that stops this happening again
- Akita’s approach to AC repair and ongoing care
- Steps to check if the AC compressor is malfunctioning
- How low refrigerant affects whether your AC starts at all
- Does thermostat placement affect whether your AC starts?
- How extreme heat or cold can stop your AC starting
- What does it typically cost to fix an AC that won’t start?
- Is your AC completely dead, or just misbehaving?
- What matters most when your AC won’t start
- Book a repair or emergency diagnostic with Akita
- Sources
Quick AC troubleshooting checklist to run through now
Work through these in order. Most homeowners find the answer within the first three steps, according to guidance from LC Heating & Air’s troubleshooting checklist, which lists thermostat and airflow faults as the most common first-line issues.
- Check the thermostat. Confirm it is set to “cool,” the setpoint is at least 3 degrees below room temperature, and the display is lit. Swap the batteries even if the screen looks fine. A dying battery can show a full display while failing to send a call for cooling.
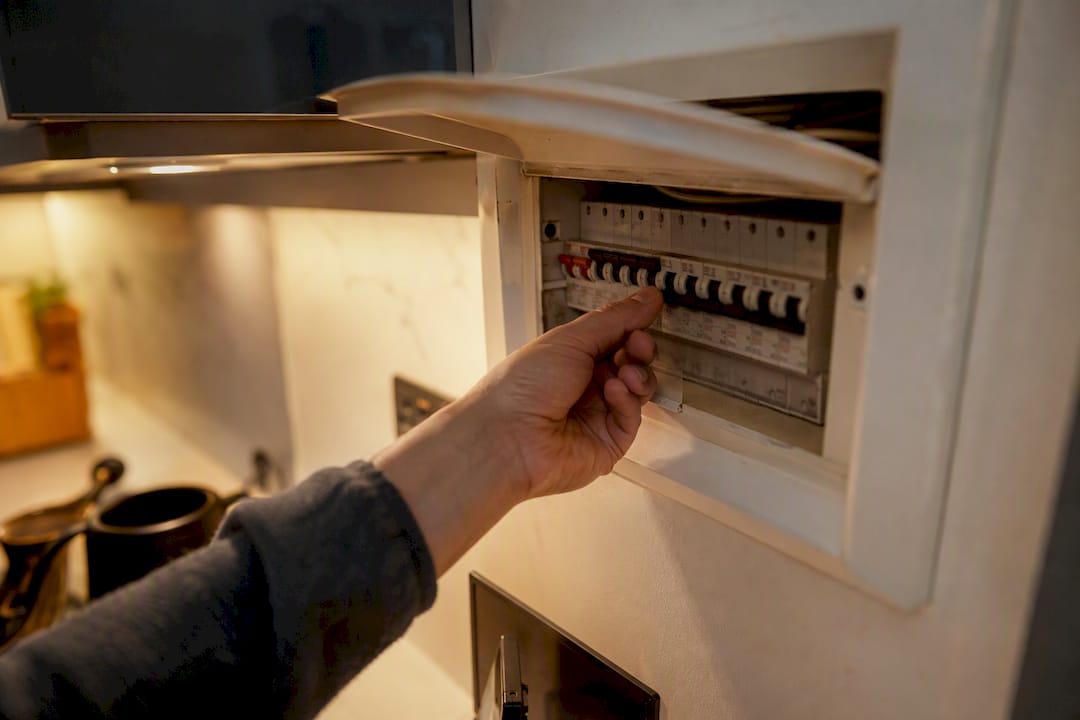
- Check your main electrical panel. Look for a breaker sitting in the middle position rather than fully on. Flip it fully off, then fully on. If you have a dedicated AC breaker, check that one specifically.
- Check the outdoor disconnect switch. This is the small grey box mounted near the condenser. It can get bumped, or a lever pulled to “off” for a repair years ago and forgotten.
- Inspect the outdoor unit and vents. Look for leaves, grass clippings, or ice on the coil, and listen for a faint hum or vibration when you flip the system on. That hum can tell you whether the unit is trying to start at all.
- Check the air filter and condensate pan. A filter you can’t see light through is starving the airflow. A condensate pan filling with water usually means a blocked drain, and many systems have a float switch that shuts the whole unit down when that happens.
- Power-cycle the system. Switch the thermostat off, flip the outdoor disconnect and the breaker off, wait 60 seconds, then restore power in reverse order.
Pro Tip: Time your power-cycle wait properly. Restoring power too quickly, within a few seconds, often fails to clear the fault that tripped the system in the first place. A full 30 to 60 second pause lets the control board’s internal lockout reset.
Why does your AC unit refuse to start?
Understanding what’s actually happening behind each fault helps you decide whether it’s a five-minute fix or a job for a technician. Manufacturer guidance from Carrier, Lennox, and Trane converges on the same six or seven root causes, and they all fall into a handful of categories.
Electrical faults are the most common starting point. A breaker trips when the circuit draws more current than it’s rated for, often because a component downstream, like a failing capacitor or a seizing motor, is pulling extra amps as it struggles to start. Engineering literature on HVAC electrical systems identifies supply faults and breaker trips as among the most frequent reasons a unit fails to power up at all. A breaker that trips once might be a fluke. A breaker that trips every time you reset it is telling you a component is drawing too much current, and that’s not something to keep resetting repeatedly.
Control faults sit one layer up from the electrics. Your thermostat is essentially a low-voltage switch telling the system when to run. If the wiring behind it has come loose, if it’s set to “heat” by mistake, or if the batteries have quietly died, the outdoor unit never gets the signal to start, even though it has full power available.
Airflow and drain problems cause a different kind of shutdown. Many residential systems include a condensate safety switch, sometimes called a float switch, that cuts power to the unit the moment the drain pan fills. It’s a genuinely useful safety feature that stops water damage. It’s also one of the most overlooked causes of a “dead” AC, because the unit isn’t actually broken. It’s protecting itself. App Heating Distribution’s guide to drain and floater issues notes that algae buildup in warm, humid climates is a recurring cause of these blockages, particularly in units that haven’t had a drain flush in a year or more.
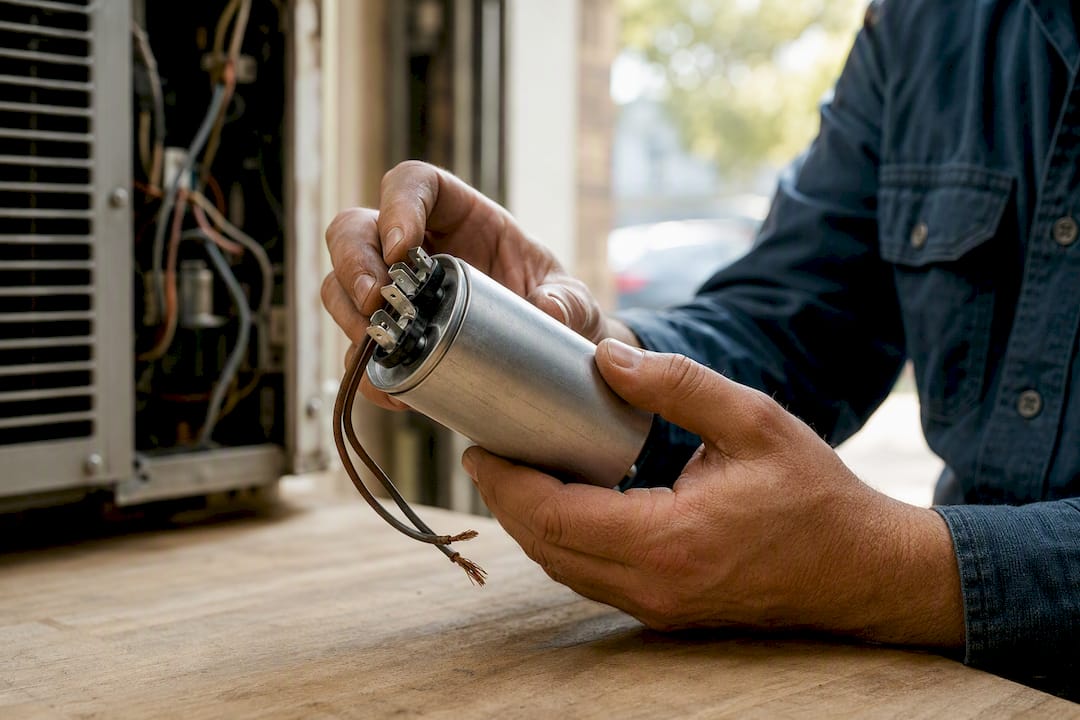
Mechanical and electrical component faults are where DIY should stop. A failed start capacitor can’t deliver the jolt of energy a compressor motor needs to begin spinning. A welded contactor, the relay switch that connects power to the outdoor unit, can either stick open (no power reaches the compressor) or stick closed (the unit runs constantly and never shuts off). A seized fan motor or compressor is a mechanical failure, not an electrical one, and no amount of resetting will fix it.
Safety lockouts and error codes exist because modern control boards are built to protect the compressor, which is by far the most expensive part in the system. When a board detects abnormal current, pressure, or temperature, it locks the unit out rather than letting a small problem become a large repair bill. If your thermostat or outdoor unit shows a blinking light pattern or an error code, that code is diagnostic gold for a technician and worth writing down before you call anyone.
How to run each safety check properly
Each of these tests takes a few minutes and needs nothing more than what’s already in your home.
- Test the thermostat’s call for cooling. Set the mode to “cool,” drop the setpoint several degrees below room temperature, and listen for a click at the thermostat within about 30 seconds. No click, no display, or a display that resets itself usually points to batteries or wiring rather than the outdoor unit.
- Replace the batteries even if the screen looks fine. Many smart thermostats keep the display alive on a fading battery for days while failing to send the actual signal that starts the system. This is a genuinely common blind spot flagged in thermostat diagnostic guidance, which covers wiring and compatibility issues that mimic a dead unit.
- Reset the breaker properly. Flip it fully to “off,” not just to the middle, then fully to “on.” If it trips again immediately, stop. Repeated tripping means something downstream is drawing too much current, and that’s a job for a technician, not a second or third reset.
- Check the outdoor disconnect switch and inspect, don’t touch, the panel. Confirm the lever or breaker inside the grey disconnect box is in the “on” position. Do not open the unit’s internal electrical panel or probe any wiring. That’s where live voltage lives.
- Replace the filter if it’s visibly grey or clogged. Hold it up to a light. If you can’t see through it, it’s restricting airflow enough to cause problems. Clear leaves, grass, or debris from around the outdoor condenser, keeping at least a couple of feet of clearance on all sides.
- Check for ice on the coil. If you see frost or ice, switch the system off and let it thaw fully, which can take several hours, before testing again. Running an iced system risks damaging the compressor.
- Check the condensate drain and float switch. Find the drain line, usually a white PVC pipe near the indoor unit, and see if water is backed up. A wet/dry vacuum on the outdoor end of the line can often clear a simple clog. If the pan is full and a float switch is visibly tripped up, that explains the shutdown immediately.
- Look, but don’t test, the capacitor and contactor. Through the outdoor unit’s access panel (power off first), a bulging, leaking, or blackened capacitor is a visible sign of failure. Do not attempt to discharge or replace it yourself.
- Write down everything you tried. Note which breaker tripped, what the thermostat displayed, any noises from the outdoor unit, and whether the fan spun at all. This single step can cut a technician’s diagnostic time significantly.
Pro Tip: If the outdoor fan spins freely by hand when the power is off, that rules out a seized motor. If it feels stiff or won’t turn at all, mention that specifically when you call for a repair.
When should you stop and call a professional?
Some faults are genuinely safe to fix yourself. Others need a licensed technician, both for your safety and because refrigerant handling is legally restricted to certified professionals in most of the United States.
Call a professional if you’re dealing with:
- A breaker that trips again immediately after resetting, which points to a component fault rather than a random glitch
- A burning smell from the indoor or outdoor unit, which should stop you from restoring power at all
- A capacitor that looks bulged, leaking, or scorched
- A compressor or fan motor that hums but won’t spin, or doesn’t respond at all
- Suspected refrigerant loss (an oily residue near the lines, unusually long cooling cycles, or an outdoor unit that runs but never gets cold)
- Any wiring you can see is frayed, chewed, or loose at the thermostat or outdoor disconnect
Before you call, have this ready: what the thermostat showed, which breaker tripped and how many times, any noises or smells, whether the outdoor fan turned at all, and any error codes on the display. A technician arriving with that information can usually narrow the fault down before they’ve even opened the access panel, which often means a shorter visit and a smaller bill. Akita’s air conditioning repair service starts most visits with exactly this kind of structured diagnostic conversation.
Maintenance that stops this happening again
A large share of “AC won’t start” call-outs trace back to neglect rather than a genuine component failure, and most of it is preventable with a few habits.
- Replace the filter every 60 to 90 days, more often if you have pets or run the system constantly through summer
- Clear a two-foot radius around the outdoor unit each season, removing leaves, mulch, and overgrown shrubs
- Book an annual service check, ideally in spring before peak demand, where a technician tests capacitor readings, refrigerant pressure, and drain flow before they become failures
- Fit a surge protector on the outdoor unit’s circuit, since power spikes from storms are a genuine cause of premature capacitor failure
Pro Tip: A capacitor rarely fails without warning. Most show a small drop in their microfarad rating for months before they fail completely, which is exactly what an annual service check is designed to catch.
For more on catching airflow issues before they cause a shutdown, Akita’s guide to troubleshooting air conditioning faults at home covers seasonal checks in more depth.
Akita’s approach to AC repair and ongoing care
Akita installs, repairs, and maintains residential and commercial air conditioning systems across Suffolk, Norfolk, and Essex, with technicians trained specifically on the electrical and refrigerant-side faults covered above. A repair visit typically includes a full diagnostic check, transparent fixed-price repair options once the fault is identified, and guidance on whether a repair or a system upgrade makes better financial sense long term.
Akita’s service plans extend beyond one-off repairs:
- Scheduled annual or biannual servicing to catch capacitor wear and drain blockages early
- Priority booking for members during peak summer demand
- Transparent, fixed-price quotes before any work begins, with flexible financing available
You can see the full scope of what a repair visit covers on Akita’s air conditioning repair page.
Steps to check if the AC compressor is malfunctioning
The compressor is the most expensive component in your system, so it’s worth ruling it out methodically rather than guessing. Start by listening at the outdoor unit when the thermostat calls for cooling. A loud humming sound with no fan movement often points to a failed start capacitor rather than the compressor itself, since the capacitor is what gives the compressor motor its initial kick to start spinning.
If you hear a clicking sound that repeats every few seconds, that’s frequently the internal overload protector on the compressor tripping and resetting, a sign the motor is trying to start and failing. A single loud clunk followed by silence, with the breaker tripping shortly after, suggests a more serious internal fault, possibly a seized or grounded compressor.
Check whether the outdoor fan spins at all. If the fan runs but you feel no vibration or sound from the compressor housing itself, and the line running back to the indoor unit doesn’t cool over several minutes, the compressor may not be engaging even though the rest of the unit has power.
None of these checks should involve opening the sealed compressor unit or testing its windings with a multimeter unless you’re a qualified technician. Compressor diagnosis often requires measuring electrical resistance across the windings and checking refrigerant pressures together, both of which need calibrated equipment and, in the case of refrigerant, legal certification to handle safely.
How low refrigerant affects whether your AC starts at all
Low refrigerant rarely stops an AC from turning on outright, but it’s a common reason a system appears to start and then shuts down again within minutes. Most modern systems include a low-pressure safety switch that cuts power to the compressor if refrigerant pressure drops below a safe threshold, protecting the compressor from running dry and overheating.
So the pattern to watch for is specific: the outdoor fan spins, you hear the compressor engage, and then everything shuts off again after a short run, sometimes repeating every few minutes. That short-cycling pattern is one of the clearer signs of a refrigerant leak rather than an electrical or thermostat fault.
Refrigerant doesn’t get “used up” through normal operation. If your levels are low, there’s a leak somewhere in the system, whether at a coil, a fitting, or a line joint, and topping up the gas without finding and sealing that leak just delays the same problem. This is squarely a job for a licensed technician: refrigerant handling requires specific certification and equipment, and in most of the United States, it’s illegal for anyone else to purchase or handle refrigerant for HVAC systems. If you suspect low refrigerant, a technician will pressure-test the system, locate the leak, repair it, and then recharge to the manufacturer’s specified level.
Does thermostat placement affect whether your AC starts?
Thermostat location matters more than most homeowners realise, and a poorly placed thermostat can genuinely mimic a “won’t start” fault. If your thermostat sits in direct sunlight, near a kitchen, or close to a supply vent, it reads a temperature that doesn’t match the rest of the room.
A thermostat baking in afternoon sun can read several degrees warmer than the actual room, which means it may never call for cooling because it thinks the space is already comfortable when it isn’t, or conversely, it may cycle far more than needed. A thermostat mounted near a return air vent or an exterior wall can read artificially cool, again delaying or preventing a call for cooling that the rest of your home actually needs.
This isn’t a fault with the AC unit at all, but it presents identically: a thermostat with power, a correct setpoint, and a system that never appears to engage. If you’ve ruled out batteries, wiring, and breaker faults and the system still seems reluctant to start on schedule, check whether the thermostat’s physical location makes sense. Interior walls, away from direct sunlight, vents, doorways, and heat-generating appliances, are the standard placement for a reason.
How extreme heat or cold can stop your AC starting
Weather extremes put more strain on a startup than most people expect. On very hot days, above roughly 95°F, an AC unit already running near its capacity limit draws more current to start each cycle, and that extra draw can be exactly enough to push a marginal component, like a weakening capacitor, over the edge into failure. This is why AC failures cluster so heavily during heatwaves: it’s not coincidence, it’s components that were already borderline finally giving out under peak load.
Cold weather causes a different problem. Most residential AC condensers aren’t designed to run efficiently below around 60°F, and many have a built-in low-ambient control that prevents the compressor from starting at all in cold conditions, to protect it from damage caused by oil not circulating properly at low temperatures. If you’re trying to run your AC on an unseasonably cool day and it won’t engage, that may be the system protecting itself rather than a fault.
Extreme cold overnight can also cause ice to form on an outdoor coil if the unit was run late into a cooling evening, which is one reason a system might refuse to restart the next morning until that ice has fully thawed.
What does it typically cost to fix an AC that won’t start?
Repair costs for a non-starting AC vary widely depending on the actual fault, which is exactly why an accurate diagnosis matters before you commit to any repair. A blown fuse or a simple breaker reset costs nothing beyond the time it takes. A capacitor replacement is one of the more affordable component repairs, since the part itself is inexpensive and the labour involved is straightforward once the unit is open.
A contactor replacement sits in a similar affordable bracket. Both are common enough repairs that most technicians carry replacement parts on their service vehicles, meaning many capacitor or contactor faults get fixed in a single visit.
Costs climb from there. A condensate drain clear or float switch repair is generally a lower-cost callout, but if the blockage has caused water damage, that adds a separate repair entirely. Compressor and fan motor replacements sit at the expensive end of the spectrum, since the compressor is the single most costly component in the system, and in some cases the labour to access and replace it rivals the part cost itself. Refrigerant leak repairs vary enormously depending on where the leak is and how much refrigerant needs recharging afterwards.
The honest advice here is not to guess. A fixed-price diagnostic visit tells you exactly which category your repair falls into before you agree to anything, which is a more reliable way to budget than assuming the worst or the best case.
Is your AC completely dead, or just misbehaving?
There’s a meaningful difference between a unit that’s genuinely failed and one that’s simply locked out or starved of power, and the signs usually point clearly one way or the other.
Signs pointing to a minor, fixable issue: the thermostat display is lit and responsive; the breaker hasn’t tripped, or trips only once; the outdoor fan spins when you test it manually; you can hear a faint hum or click when the system calls for cooling; the filter is visibly dirty or the condensate pan has standing water.
Signs pointing to a more serious failure: the breaker trips again immediately every time you reset it; you smell burning from the indoor or outdoor unit; the outdoor fan doesn’t spin even slightly and there’s no sound at all when the system should engage; you see visible damage to a capacitor, wiring, or the compressor housing; the system runs but produces no cold air at all after 15 to 20 minutes.
A genuinely “dead” unit, in the sense of a compressor or motor failure, is actually less common than people assume. Far more often, what looks like total failure is a breaker, a float switch, or a dead thermostat battery presenting as something dramatic. That’s exactly why the checklist earlier in this guide is worth running through fully before assuming the worst.
What matters most when your AC won’t start
Most guides on this topic treat every fault as equally mysterious, sending readers straight to “call a professional” without distinguishing between a five-minute battery swap and a genuine compressor failure. That’s not particularly useful advice, and it isn’t what the evidence actually supports. The overwhelming majority of “AC not turning on” cases trace back to power, thermostat, or airflow issues that a homeowner can diagnose safely in under ten minutes.
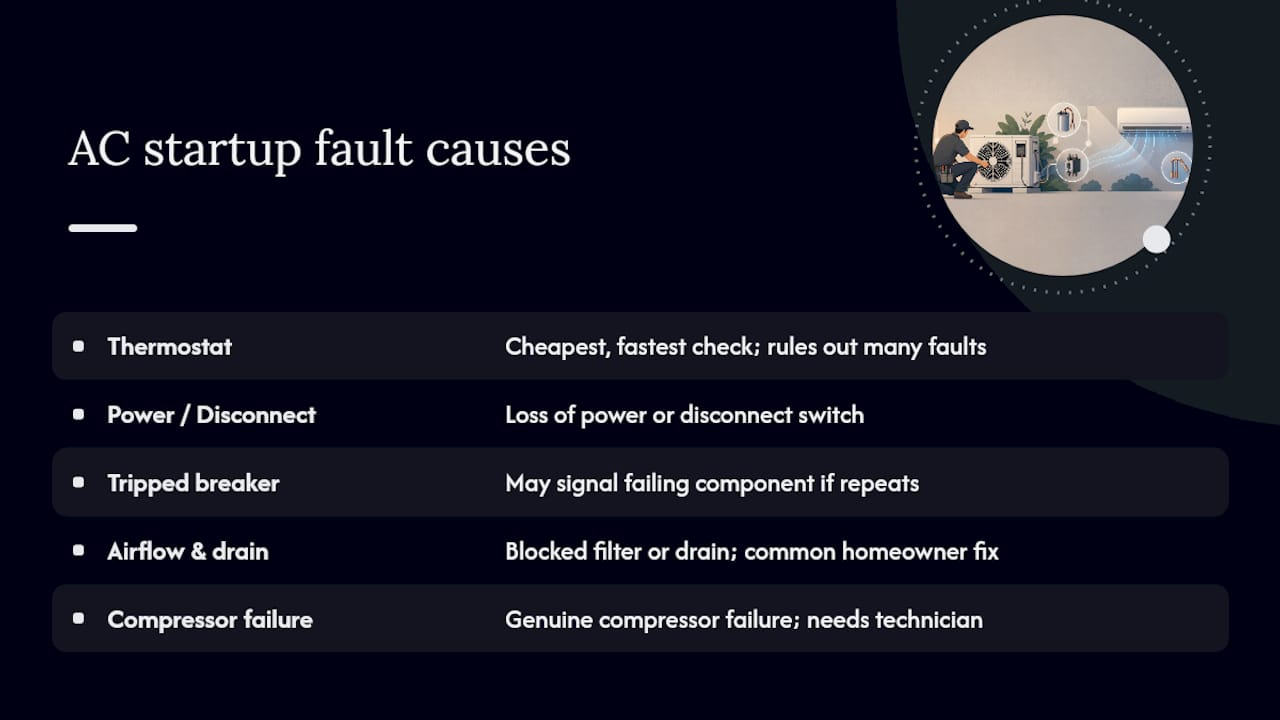
Where the conventional advice falls short is in treating a tripped breaker as a simple reset-and-forget fix. It usually isn’t. A breaker that trips once might be nothing. A breaker that trips every single time is a component telling you it’s failing, and resetting it repeatedly just delays a repair while risking further damage to whatever’s drawing that extra current.
What should you prioritise first? The thermostat, always. It’s the cheapest, fastest check, and it rules out or confirms an entire category of faults in under a minute. After that, the breaker and disconnect switch. Everything past those two checks starts moving into territory where a technician’s tools and certification genuinely matter, particularly anything involving refrigerant or the inside of an electrical panel.
— Akita
Book a repair or emergency diagnostic with Akita
If you’ve worked through the checklist above and your AC still won’t start, or you’d rather skip straight to a professional diagnosis, Akita offers fixed-price repair visits across Suffolk, Norfolk, and Essex. A typical booking starts with a call-out to assess the fault, a full diagnostic check of the electrical, thermostat, and refrigerant systems, and a fixed-price repair quote before any work begins, so there are no surprises once the technician opens the access panel.

If your system has failed repeatedly or the repair costs are starting to rival a replacement, it’s worth asking about Akita’s domestic air conditioning installation options as a longer-term alternative. Either way, the next step is straightforward: book a diagnostic visit through Akita’s air conditioning repair page and get a technician looking at the actual fault rather than guessing from a checklist.
Sources
- NCBI — engineering/technical overview (general HVAC electrical discussion)
- LC Heating & Air — AC not turning on troubleshooting guide
- App Heating Distribution — heat pump/AC drain and floater checks