

How to clean air conditioning filters safely at home
You can clean most washable AC filters in a short time, and the process is simpler than most homeowners expect. Turn the power off at the wall and the breaker, slide or lift the filter out, vacuum off loose dust, wash it in lukewarm water with a little mild washing-up liquid, then let it dry completely before refitting. Daikin’s own maintenance guidance puts the job at a brief duration for a typical clean, increasing if the filter is badly clogged or you’re doing more than one unit.
The one non-negotiable step is isolating power before you touch anything. Never clean a filter, coil, or grille while the unit is switched on.
Here’s the fast version, if you’re standing in front of the unit right now:
- Switch off at the wall and the breaker. Don’t skip this.
- Remove the filter (check whether yours clips, slides, or lifts).
- Vacuum with a soft brush attachment to lift loose dust and hair.
- Wash washable filters in lukewarm water with mild detergent. Rinse well.
- Shake off excess water and air-dry fully, away from direct heat.
- Refit the right way round and restore power.
Pro Tip: If your filter is disposable, paper, pleated, or fibreglass, don’t wash it at all. Water breaks down the fibres and wrecks the filtration. Replace it instead.
Table of Contents
- How to clean air conditioning filters: what you need and safety first
- Step-by-step cleaning for common unit types
- Washable versus disposable filters: how to tell them apart
- Safe cleaners, tools, and what to avoid
- How often to clean AC filters and the signs you’re overdue
- When cleaning isn’t enough: call a professional
- Why filter cleaning is only one part of AC maintenance
- A homeowner’s first attempt: what actually happens
- If you’d rather leave it to a professional
- Key takeaways: what to remember about cleaning AC filters
- Sources
How to clean air conditioning filters: what you need and safety first
You don’t need much kit for this job, and most of it is already in the kitchen cupboard. Gather a soft-bristled brush, a vacuum cleaner with a brush nozzle attachment, a bowl or sink large enough for the filter, mild washing-up liquid, a microfibre cloth, and a pair of gloves if you’re squeamish about built-up dust. That’s genuinely the full list for a standard domestic clean.
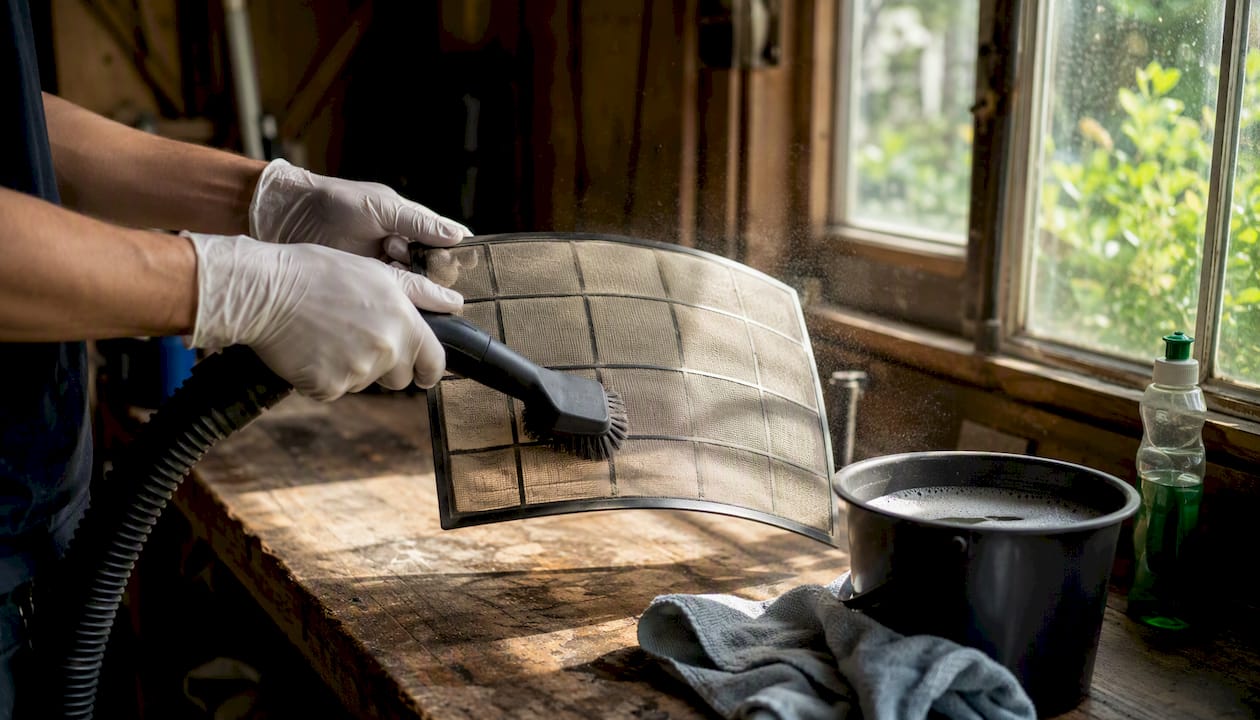
Power isolation matters more than any cleaning technique you’ll read below. Switch the unit off at its control panel or wall switch first, then go to the consumer unit and switch off the relevant circuit breaker. Trane’s maintenance guidance is explicit on this point: the system must be fully off before you open any panel or handle a filter. Cleaning with the unit live risks an electric shock and can also damage the fan motor if it starts up while you’ve got a hand inside.
If you’re dealing with a wall-mounted split unit positioned high above head height, don’t balance on a chair or stretch from a stepladder that isn’t rated for the job. A proper stepladder with a locked platform is worth the ten minutes it takes to fetch one. And keep water away from any exposed electrical terminals, control boards, or wiring, even once the power is off. Dampness sitting inside a unit for days can cause corrosion long after you’ve forgotten about the clean.
Pro Tip: Lay an old towel on the floor beneath wall-mounted units before you start. Filters drip more than you’d think, and nobody wants soapy water running down their skirting board.
Step-by-step cleaning for common unit types
The core process is the same everywhere: isolate power, remove, clean, dry, refit. What changes is how the filter comes out and how many panels you’re dealing with. Here’s how it breaks down by unit type.
Split or mini-split units: switch off, open the front panel (it usually flips up or forward on hinges), and slide or lift the filter out. Most have two filters side by side.
- Vacuum both filters gently with a brush attachment to remove loose dust and pet hair.
- If the filter is washable mesh or foam, rinse under lukewarm running water or wash it in a bowl with a small amount of mild washing-up liquid.
- Avoid hot water and stiff-bristled brushes. Both can warp or tear the mesh.
- Shake off excess water, then stand the filter upright in a shaded, well-ventilated spot until it’s bone dry, not just damp-to-the-touch.
- Slide the filter back in the same orientation it came out, close the panel, and restore power.
Window and portable units: the process mirrors split units, but access is usually through a front or rear grille rather than a hinged flap. Frigidaire’s owner support guidance recommends warm, soapy water for most room air conditioner filters, followed by thorough air drying before you put the filter back. Portable units sometimes have the filter tucked behind a rear intake grille, so check both sides if airflow still seems weak after cleaning the obvious one.
Central return filters: these sit behind a wall or ceiling grille rather than inside the unit itself. Undo the grille (usually a couple of screws or clips), slide the filter free, and check the size printed on the frame edge. Central filters are more often disposable pleated types, so before you get the bowl out, check whether yours is washable at all.
Pro Tip: Before you remove any filter for the first time, take a photo of it in place and note the size and model printed on the frame. It saves a frustrating rummage through the manual later, and you’ll know exactly what to order if you ever need a replacement.
If your unit has an unusual clip mechanism or a dual-filter panel with layers stacked together, check the manufacturer’s manual. There’s enough variation between brands that a five-minute check beats guessing and snapping a plastic clip.
Washable versus disposable filters: how to tell them apart
Most domestic air conditioning filters fall into two camps, and mixing them up is the single most common mistake homeowners make.
Washable filters are usually a fine mesh or open-cell foam, often grey or blue, and they feel flexible when you bend them. These are designed to be rinsed and reused repeatedly. Disposable filters are stiffer: pleated paper, thin cardboard-framed fibreglass, or dense synthetic media that looks almost felt-like. Fibreglass and paper filters absorb water and lose their structure once wet, so washing them ruins the pleats and defeats the point of having them.
The EPA’s guidance on MERV ratings explains why this split exists: higher-efficiency pleated filters trap much finer particles, but that density of media is exactly what makes them unsuitable for washing. Reusable mesh filters trade some filtration performance for the convenience of being rinsable indefinitely.
| Filter type | How to identify it | Can you wash it? |
|---|---|---|
| Mesh or open-cell foam | Flexible, often grey or blue, stretches slightly | Yes, wash and reuse |
| Pleated paper or synthetic | Stiff folds, cardboard-style frame | No, replace only |
| Fibreglass | Fine spun fibres, often white, brittle when dry | No, replace only |
Replace any filter, washable or not, if you spot tears, warping, persistent mould that won’t rinse away, or a frame that’s cracked or no longer sits flush. A few signs to watch for:
- Visible black or green spotting that survives a wash.
- A musty smell that lingers after the filter has fully dried.
- Bent or crushed mesh that no longer sits flat in its frame.
- A disposable filter that’s visibly grey or clogged, which typically needs replacing every one to three months depending on use.
Safe cleaners, tools, and what to avoid
No, don’t spray water directly into a running indoor unit, ever. If you’re wondering whether you can hose down the filter or grille while the AC is switched on, the answer is a flat no. Water and live electrical components inside the unit are a genuinely dangerous combination, and it can also trip internal safety cutouts unnecessarily. The rule is different for outdoor condensers: once you’ve switched the unit off at the isolator, a garden hose on a gentle setting is generally fine for rinsing debris off the outdoor coil, since that component is built to handle rain and outdoor conditions anyway.
For the filter itself, stick to gentle materials:
- Soft-bristled brush or vacuum with a brush nozzle for loose dust.
- Lukewarm water, never hot, which can warp plastic frames and mesh.
- A small amount of mild washing-up liquid for grease or grime.
- A shaded, airy spot for drying, not direct sun or a radiator.
Pressure washers, bleach solutions on coils, and metal-bristled brushes on mesh filters are the three most common ways homeowners damage a filter that would otherwise have lasted years. Bleach in particular can corrode aluminium fins on the coil behind the filter, and a pressure washer’s force is enough to blow mesh clean out of its frame.
Strong solvents and degreasers aren’t necessary either. Mild detergent shifts household dust and cooking residue perfectly well, and anything harsher risks leaving a chemical residue that gets blown straight back into the room once the unit’s running again.
How often to clean AC filters and the signs you’re overdue
Frequency depends heavily on how the unit is used, and Consumer Reports notes that factors like pets, allergies, and how hard the system works all shift the ideal schedule. A spare room unit that runs occasionally needs far less attention than a main living room unit running all summer with a dog shedding nearby.
| Household situation | Recommended cleaning interval |
|---|---|
| Light, occasional use | Every 2 to 3 months |
| Regular summer use | Monthly |
| Pets or allergy sufferers in the home | Every 2 to 4 weeks |
| Heavy daily use | Every 2 weeks |
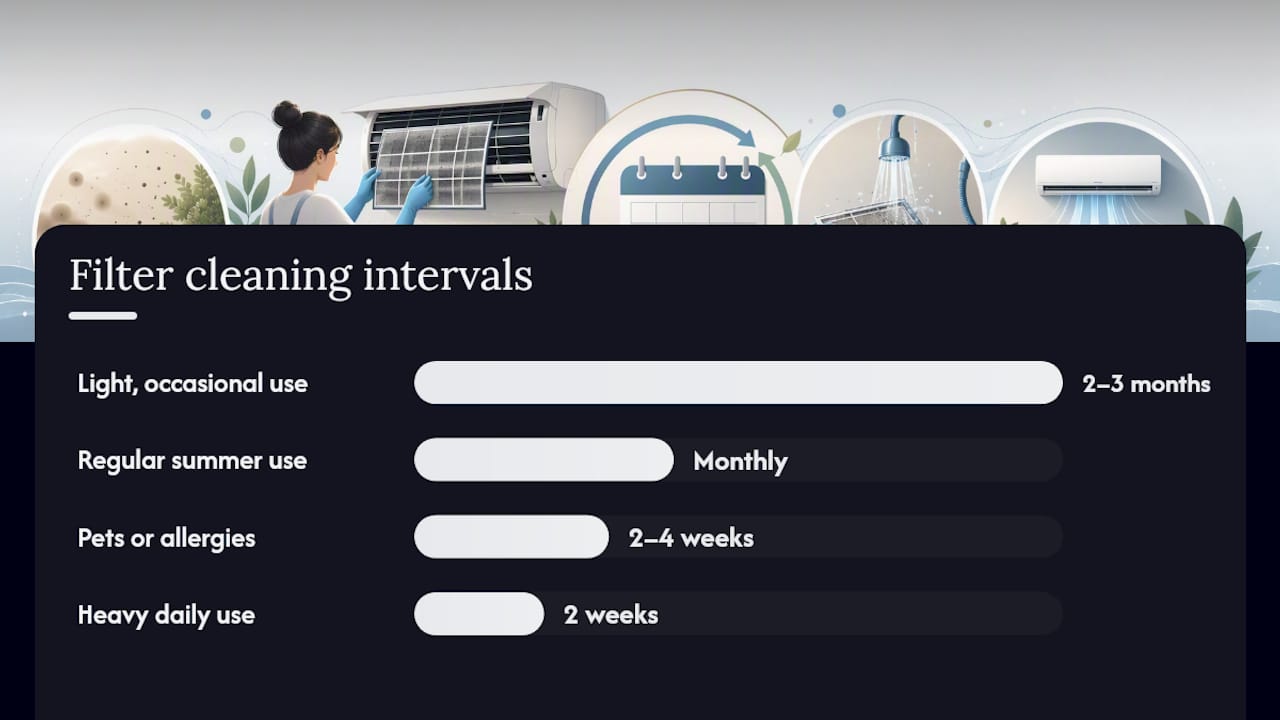
Daikin specifically flags the two-week interval for heavy use, which lines up with what most manufacturers recommend once a unit is running for long stretches each day.
Between scheduled cleans, watch for signs the filter needs attention sooner than planned:
- Noticeably weaker airflow from the vents or grille.
- A jump in your energy bill without any change in usage.
- A musty or stale smell when the unit switches on.
- Visible grey dust or fluff on the grille itself.
- The room taking longer than usual to reach your set temperature.
Any one of those on its own might mean nothing. Two or three together usually means the filter’s overdue.
When cleaning isn’t enough: call a professional
Some problems look like a dirty filter but aren’t, and pushing on with DIY cleaning in these cases wastes time or, worse, causes damage. Watch for these red flags:
- A musty smell that persists even after the filter’s been cleaned and fully dried.
- Visible mould on internal components you can’t reach by removing the filter.
- Ice building up on the coil, which usually points to a refrigerant issue.
- Water pooling or leaking from the unit, which often means a blocked condensate line.
- Hissing, rattling, or grinding noises that weren’t there before.
- A refrigerant smell, which is a job for a qualified engineer, not a homeowner with a cloth.
DIY cleaning has real limits. Refrigerant handling requires certification, deep coil cleaning often needs specialist tools and chemicals, and any electrical fault behind the panel isn’t a job for a screwdriver and good intentions. This is also why annual professional servicing remains standard advice even for homeowners who clean their filters diligently.
Pro Tip: When you book an engineer, tell them exactly what you’ve already done, when you last cleaned the filter, what symptoms remain, and any noises or smells you noticed. It saves diagnostic time and often saves you money on the callout.
Why filter cleaning is only one part of AC maintenance
Filter cleaning is the task homeowners can safely handle themselves, but it’s a fraction of what keeps a system running well. A qualified technician checks refrigerant levels, inspects coils for corrosion or buildup you can’t see behind the filter, tests electrical connections, and clears condensate drains that clog silently over a season. None of that is visible from the front panel.
Manufacturer guidance from brands like Daikin consistently stresses that a filter must be completely dry before refitting, since residual moisture sitting inside a closed unit is one of the most common causes of mould growth between cleans.
A few habits pay off between professional visits: keep vents and grilles free of furniture or curtains blocking airflow, trim back any foliage crowding an outdoor condenser, and if you’ve bought spare filters, store them flat in a dry cupboard rather than folded in a drawer. If you’re using a spare replacement filter while the washable one dries, label it so you don’t mix up which is due for its next clean.
A homeowner’s first attempt: what actually happens
Doing this for the first time typically takes closer to 20 minutes than the 30-minute upper estimate, mostly because half that time is spent figuring out how the panel opens. Once the filter’s out, the actual washing and vacuuming takes no time at all. The most noticeable change tends to come within the first hour of switching the unit back on: airflow that felt sluggish picks up, and any faint musty smell in the room clears within a day or two of running.
One habit worth building in from that first clean: keep the unit’s manual somewhere you’ll actually find it again, and stick a small label inside the panel noting the filter size and the date you last cleaned it. Future you will be grateful.
If you’d rather leave it to a professional
Plenty of homeowners are happy to handle filter cleaning themselves but would rather not go near coils, refrigerant lines, or electrical checks. That’s a reasonable line to draw, and it’s exactly where a professional maintenance visit earns its keep.
A typical professional service goes well beyond what a filter clean covers: a full internal deep clean, coil cleaning to clear buildup that vacuuming can’t reach, a refrigerant level check, condensate drain clearing to prevent leaks, and a safety inspection of the electrical connections. Akita carries out exactly this scope of work across Suffolk, Norfolk, and Essex, and offers maintenance contracts so servicing happens on a schedule rather than only when something’s already gone wrong. If your unit is overdue a proper check or you’re weighing up whether to repair an ageing system or upgrade it, Akita’s domestic air conditioning installation service is a straightforward place to get a fixed-price quote and book a visit without any pressure to commit on the spot.
Key takeaways: what to remember about cleaning AC filters
Cleaning most washable AC filters takes 15 to 30 minutes and hinges on one rule: isolate the power first and let the filter dry completely before refitting it.
| Point | Details |
|---|---|
| Power off first | Switch off at the wall and the breaker before touching any filter or panel. |
| Wash only washable types | Mesh and foam filters can be rinsed; pleated, paper, and fibreglass filters must be replaced instead. |
| Match frequency to use | Clean every 2 to 4 weeks with pets or heavy use, every 2 to 3 months for light, occasional use. |
| Dry fully before refitting | Damp filters left in a closed unit are a common cause of mould growth between cleans. |
| Know when to call a professional | Mould behind the filter, ice on coils, or refrigerant smells need a qualified engineer, not DIY cleaning. |
| Book Akita for the deeper work | Akita’s maintenance visits cover coil cleaning, refrigerant checks, and electrical safety inspections beyond what filter cleaning reaches. |
Sources
The guidance above draws on manufacturer instructions and independent consumer advice, all worth checking directly if you want more detail on your specific unit:
- What MERV rating should you use? | US EPA
- How often do you need to change your HVAC air filters? | Consumer Reports
- HVAC air filter maintenance guide | Trane
Always cross-check your specific model’s manual alongside this guidance, since clip mechanisms, filter sizes, and washability vary between manufacturers even within the same unit type.