

Size Aircon Pipe Trunking Right for Homeowners with Pro Workmanship
Aircon pipe trunking is the plastic casing that protects and conceals your refrigerant pipes, drain hose and interconnect cable. It shields the insulation from sun and knocks, keeps condensation off your walls, and tidies up a run that would otherwise look like an afterthought. Fit it whenever pipework is exposed indoors or outdoors and at risk from weather, foot traffic or UV.
TL;DR:
- Ensure trunking is sized to the insulated bundle with extra clearance, typically between 55 and 65mm, to allow for future access and prevent compression.
- Use outdoor-rated, UV-stabilized materials for external runs to prevent chalking and discoloration over time.
- Leave removable covers or clip-fit junctions at all bends, tees, and joints to facilitate future maintenance and avoid costly repairs.
- Proper wall penetrations should be sloped, sealed with exterior-grade sealant, and include an access point for inspections or repairs.
- Prioritize professional installation that guarantees sealed, sloped penetrations, serviceable trunking, and comprehensive warranty coverage.
Table of Contents
- What’s actually inside aircon pipe trunking
- Materials and profiles: what your trunking is actually made from
- Getting the size right (and why most installers get it wrong)
- Installing trunking indoors and outdoors: fittings and access that matter
- Spotting trouble early: faults, checks and routine maintenance
- DIY or professional installation: what it actually costs
- Why professional workmanship on trunking matters more than it looks
- Three things worth remembering before you fit anything
- Get your trunking and installation done right, first time
- Sources
What’s actually inside aircon pipe trunking
Pop the cover off a run of trunking and you’ll find more than a couple of copper pipes. There are two refrigerant lines, the liquid line and the suction line, plus foam insulation, a condensate drain hose, and usually an interconnect cable linking the indoor and outdoor units.
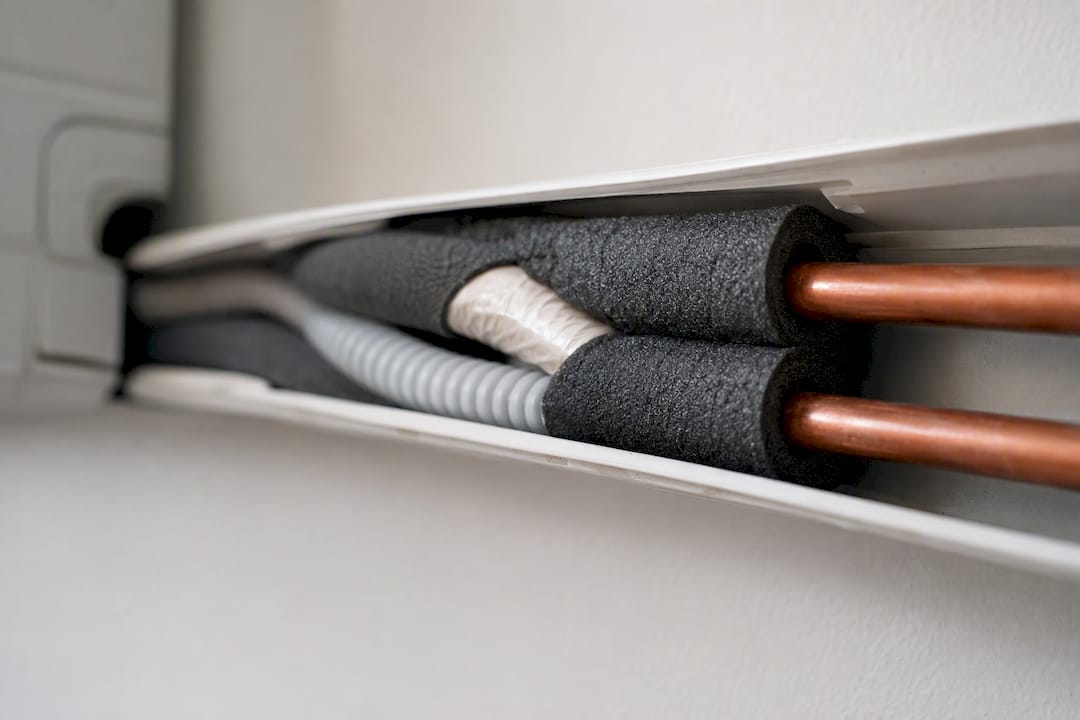
The suction line is the one that causes trouble. It runs cold, and if the closed-cell foam insulation wrapping it is compressed, torn or gapped at a bend, that line sweats. Left unchecked, that sweat becomes a drip, then a stain on your ceiling or wall. A gap as narrow as a finger’s width at a bend is enough to start condensation forming on the suction line, which is why insulation continuity matters more than most installers admit.
The drain hose needs a steady downward fall to carry condensate away. The interconnect cable, meanwhile, just needs to be kept separate from the refrigerant lines and out of the way of the drain.
What you see on the outside tells you a lot about what’s happening inside:
- Discolouration or drip marks below a joint usually mean a drain or insulation fault, not a cosmetic issue.
- A trunking cover that bulges slightly often signals compressed insulation pushing against the lid.
- Persistent damp patches near a bend point to a gap in the foam right at that turn.
Materials and profiles: what your trunking is actually made from
Most residential and light commercial trunking is manufactured from PVC or uPVC, chosen because it’s durable, inexpensive and resistant to moisture and yellowing. That’s fine for a covered wall run. Anything facing direct sun for years, though, benefits from a UV-stabilised or outdoor-rated grade, since standard PVC can chalk and discolour over time.
Profile shape matters more than buyers expect. You’ll generally choose between:
- Rectangular profiles, the standard choice for most residential runs, offering the most usable internal space for a given external footprint.
- D-shaped or rounded profiles, often used where the trunking needs to sit flush against a curved surface or blend into an architectural feature.
- Wrap-around covers, which snap fully around the pipe bundle rather than mounting on a fixed base, useful for retrofits.
Lid systems split into clip-on and snap-fit designs. Manufacturers such as Unex build modular systems with a fixed base and a separately measured cover strip, which makes future access far easier than a one-piece casing. Canalplast’s catalogue lists dedicated outdoor-rated and wrap-around options for exactly this reason. Commercial kitchens, plant rooms or anywhere near foot traffic call for fire-retardant or impact-resistant grades rather than standard domestic profiles.
Getting the size right (and why most installers get it wrong)
Sizing trunking to the copper pipe diameter alone is the single most common mistake in this trade. You need to size it to the insulated bundle, then add a working margin on top.
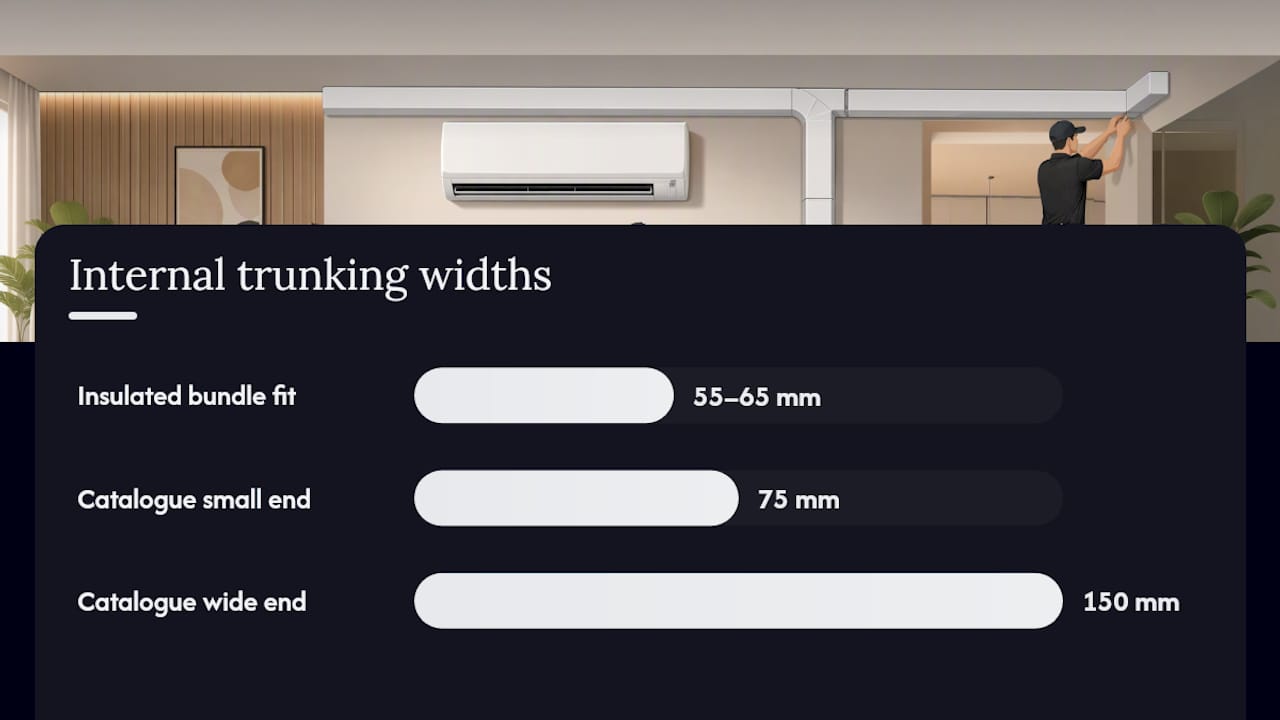
A bundle that measures 45mm insulated and combined with the drain hose should sit comfortably inside a profile with roughly 55 to 65mm of clear internal width, not one sized to the exact millimetre.
Statistic to remember: manufacturer catalogues typically offer standard internal widths in the 75mm to 150mm range, with the smaller end suiting a single small split system and the wider end needed for multi-pipe commercial runs carrying two or three refrigerant sets side by side.
Undersizing doesn’t just risk compression. It locks you out of future service access, because a tight-fitting cover leaves no room to lift insulation for inspection without disturbing the whole run.
Installing trunking indoors and outdoors: fittings and access that matter
Indoor and outdoor runs face different pressures, and the fittings you choose should reflect that.
Indoors, you’ve got three realistic routing options: along a ceiling cove, across the top of a wall just below the ceiling line, or hidden inside a false ceiling void where one exists. Outdoors, weatherproofing and UV resistance take priority over appearance, and INABA’s own guidance draws a clear line between indoor cosmetic covers and outdoor casing built to survive rain, frost cycles and direct sun.
Whichever route you take, the same fittings crop up again and again:
- Base rail – fixed to the wall first, it carries the weight of the pipe bundle and anchors the whole run.
- Cover strip – clips or snaps onto the base, sized to the profile you’ve chosen.
- Internal and external corners – pre-moulded angles that avoid cutting and folding the casing on site.
- Tees – used wherever a branch splits off to a second indoor unit.
- End caps – finish off an exposed end cleanly and keep moisture out.
- Wall sleeve – the fitting that carries the bundle through the wall penetration itself.
That wall penetration is where sloppy work does lasting damage. The hole should be drilled with a slight outward slope so any water tracks away from the building rather than into it, then sealed around the sleeve with an exterior-grade sealant, never left to rely on the trunking alone for weatherproofing.
Pro Tip: Leave a removable access point, or at minimum a run of clip-fit rather than glued covers, at every point where a joint, tee or bend sits. You will need to get back in there eventually, and cutting into glued trunking to reach a blocked drain costs far more than fitting it properly the first time.
Spotting trouble early: faults, checks and routine maintenance
Trunking faults rarely announce themselves loudly. They show up as small signs that get ignored until they’re expensive.
Watch for:
- Staining or a damp patch on the wall directly below a bend or joint.
- Visible sagging along a long horizontal run, which points to insufficient fixing centres.
- A drain that backs up repeatedly despite clearing it, suggesting a kink or dip inside the casing rather than a blockage at the outlet.
Most of these trace back to one of three root causes: a gap in the foam insulation at a bend, a condensate drain that lacks proper fall, or fixings that have loosened and let the whole bundle shift inside the casing. A dip anywhere along the drain run will collect standing water and cause the same blockage to recur no matter how often you clear it.
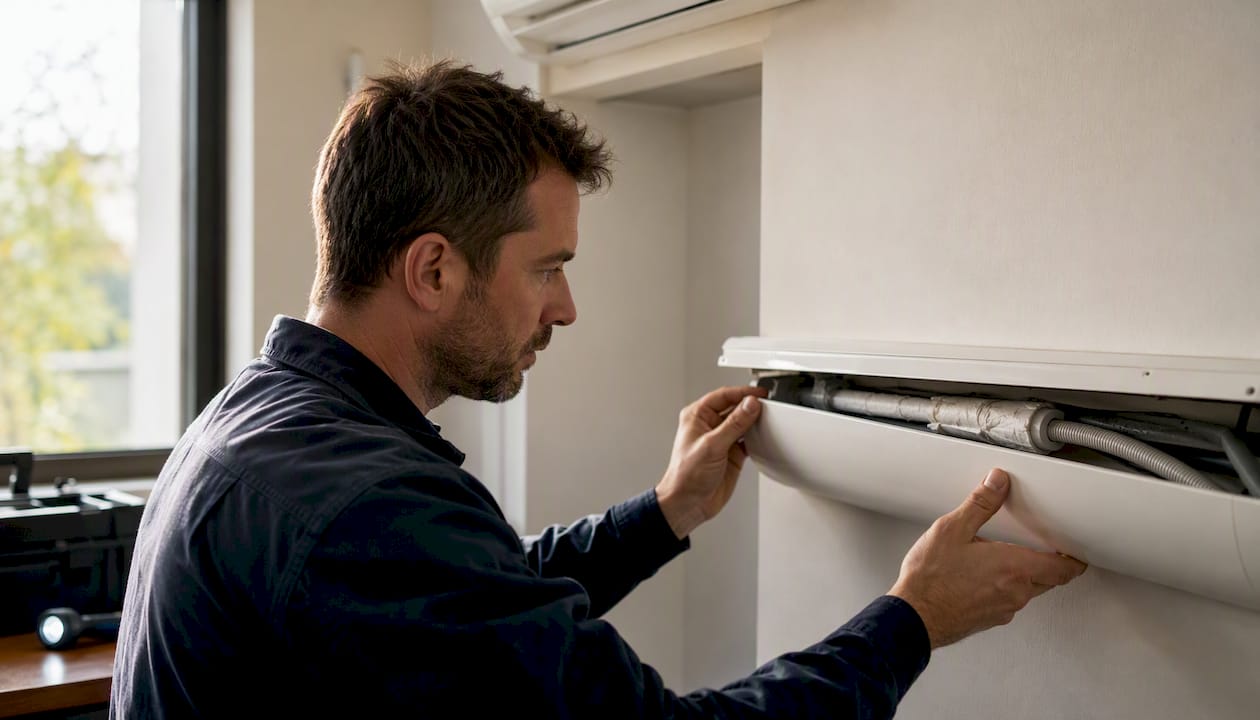
Annual maintenance should include popping a cover section to check insulation integrity, confirming the drain still falls correctly, and tightening any loose base fixings. If you’re seeing recurring staining or a blockage that returns within weeks of clearing it, that’s the point to call a professional rather than keep reaching for a wet vac.
DIY or professional installation: what it actually costs
Fitting a short, straightforward indoor run of trunking over pipework you can already see is within reach for a competent DIYer. Anything involving a wall penetration, an outdoor run, or a multi-pipe commercial installation is where professional installation earns its cost.
Cost tends to hinge on four factors: the length of the run, the number of fittings needed (every corner, tee and end cap adds labour), whether outdoor-rated material is specified, and how much access time the site requires. A short indoor run with two corners and an end cap is mostly labour; a long outdoor run with a sealed wall sleeve and multiple branches shifts the balance toward materials and site time. Our air conditioning installation cost guide breaks down how these variables typically stack up for UK-style domestic jobs.
Before booking anyone, ask:
- Is the trunking sized to the insulated bundle, or just the bare pipe diameter?
- Will the wall penetration be sealed and sloped, or just packed with expanding foam?
- Does the quote specify removable covers for future access, or a fully glued casing?
- What warranty covers the installation itself, separate from the equipment warranty?
An installer who can’t answer the sizing question confidently is a red flag worth acting on.
Why professional workmanship on trunking matters more than it looks
Trunking looks like a finishing touch. Treated that way, it becomes the most expensive mistake in the whole installation.
Once trunking is fixed to a wall, accessing the insulation or drain line behind it turns invasive. A five-minute insulation fix becomes a job that involves stripping covers, disturbing fixings, and sometimes cutting into plasterboard that was never meant to come off again.
A quote worth trusting will specify: sealed and sloped wall penetrations, a clear scope covering fittings and corners (not just “trunking, one length”), serviceable cover systems rather than glued casing, and a written warranty on the installation itself. Akita builds every domestic install around exactly that standard across Suffolk, Norfolk and Essex, treating trunking as part of the system rather than an add-on nobody checks twice.
Three things worth remembering before you fit anything
Get the sizing right first. Everything else, aesthetics, colour matching, lid style, is secondary to a profile that fits the insulated bundle with genuine clearance. Second, never let a run go in without a way to reopen it later. Third, if the run crosses a wall, goes outdoors, or involves more than one indoor unit, book a professional survey rather than guessing at fittings from a shop shelf. Balance how it looks against how easily someone can service it in five years’ time.
— Akita
Get your trunking and installation done right, first time
Choosing the right profile is only half the job. Getting it sized, sealed and fitted so it lasts is where most DIY attempts and rushed quotes fall short, and it’s exactly where Akita’s installers earn their keep. Every domestic install includes properly sealed wall penetrations, serviceable trunking covers, and a written warranty, backed by ongoing maintenance plans if you want peace of mind beyond year one.
If you’re planning a new system or replacing pipework that’s already showing damp stains, book a survey through our domestic air conditioning installation page and get a fixed-price quote that covers the trunking properly, not as an afterthought. Akita serves homeowners and small businesses across Suffolk, Norfolk and Essex, and every quote is priced upfront before any work begins.
Sources
- Air Conditioner & Piping Cover Trunking|INABA note vol.3
- Trunkings for HVAC 31 - Unex
- Air conditioning trunking systems for HVAC applications - Canalplast
- Aircon trunking explained: what runs inside the casing